# API Endpoints
URL: /docs/api-endpoints
Structure of the requests and responses for the API
***
title: API Endpoints
description: Structure of the requests and responses for the API
icon: Plug
----------
## Overview
Scan Documents API is organized around REST and ASYNC API principles.
Our API has predictable resource-oriented URLs,
accepts JSON-encoded request bodies (except for file uploads), returns JSON-encoded responses,
and uses standard HTTP response codes and methods.
## Base URL
All URLs referenced in the documentation have the following base:
```sql
https://api.scan-documents.com/v1
```
For a complete list of endpoints and their usage, please refer to our API Reference section.
## Authentication
All API requests require authentication using your API key. Include your API key in the `x-api-key` header of your request.
```http request
GET /v1/files HTTP/1.1
Host: api.scan-documents.com
x-api-key: YOUR_API_KEY
```
Check out the [Authentication](/docs/authentication) section for more information about how to get an API key and how to use it in your requests.
## Tasks Operations
Tasks operations are any `POST` API call that modifies a file, and endpoints
are usually described by the `{resource}-operations` pattern. For example, the `image-operations` endpoint is used to modify images, and the `pdf-operations` endpoint is used to modify PDFs.
## Asynchronous Processing
All the operations take from a few seconds to a few minutes to complete, depending on the files and parameters involved.
Due to the nature of the operations, all operations are processed asynchronously.
After you submit a request, a [Task](/docs/tasks) resource is created and returned in the response. You can use the
id of the task to check its status and retrieve the results, or wait for the [Webhook](/docs/webhooks) to be sent to your server
when the task is completed.
## Pagination
All endpoints that list objects provide support for pagination.
Check out the [Pagination](/docs/pagination) section for more information about how to paginate through the results.
## Billing
Each month your plan includes a fixed number of operations.
The number of operations used is independent of the number of files processed. However, there are some limits
on files per operations and global storage to prevent abuse.
## Support
If you encounter any issues or have questions about using the Scan Documents API, please don’t hesitate to browse the API Reference for detailed information on each endpoint, or contact our support team for personalized assistance.
We’re excited to see what you’ll create with the Scan Documents API. Happy coding!
# Authentication
URL: /docs/authentication
Learn how to authenticate your requests
***
title: Authentication
description: Learn how to authenticate your requests
icon: KeyRound
--------------
## Getting your API Key
As soon as you sign up for the [Scan Documents Dashboard](https://dashboard.scan-documents.com), you will be able to generate an API Key.
Under the free plan, you will be able to execute up to 25 free requests. Then, you will
need to upgrade your account to a paid plan to continue using the API.
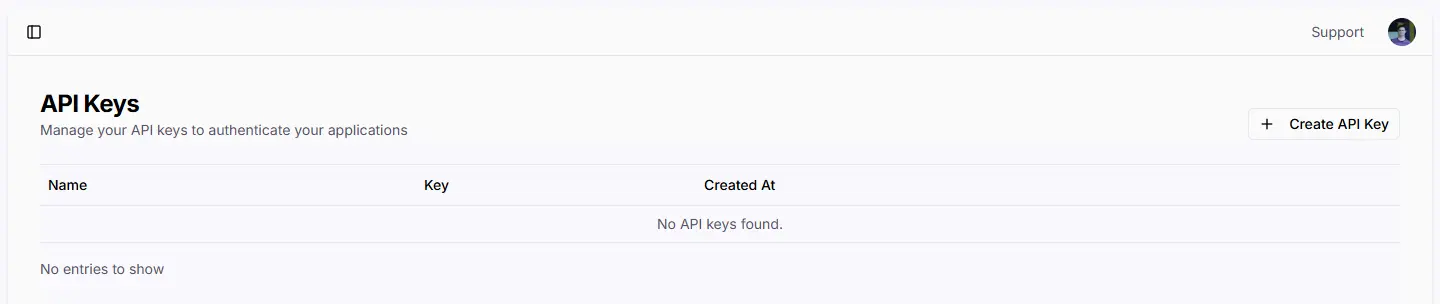
You can create your API key in the API Dashboard by clicking on the "Create API Key" button at the top right corner of
the [API Keys page](https://dashboard.scan-documents.com/api-keys).
Your API Key will be generated and displayed in a modal. Copy it and store it in a safe place!

## Using Your API Key
To authenticate your requests to the Scan Documents API, you need to include your API key in the `x-api-key` header of your request.
Here is an example of how to do this using curl:
```bash
curl -X GET https://api.scan-documents.com/v1/files \
-H "x-api-key: YOUR_API_KEY"
-H "Content-Type: application/json"
```
Request that are not authenticated with a correct API key will receive a 401 Unauthorized response.
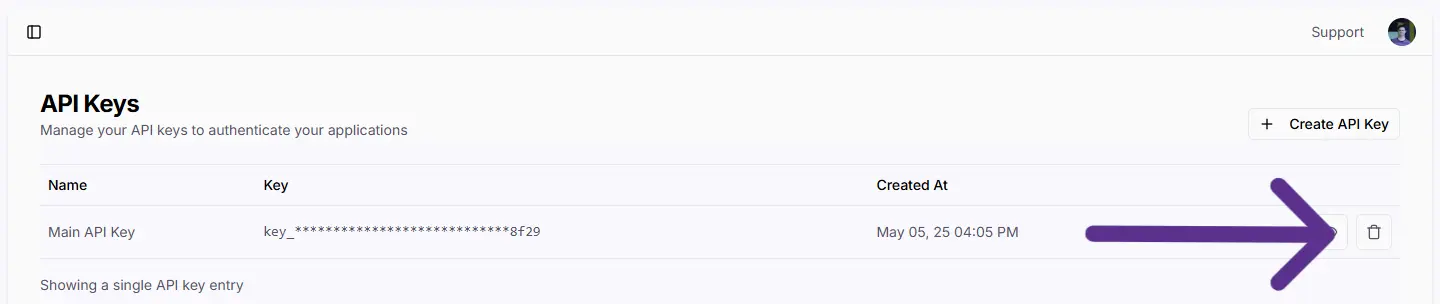
## Removing an API Key
Sometimes you may want to remove an API key. You can do this by clicking on the button with the trash icon next to the API key you want to remove.
This will remove the API key from your account, and it will no longer be valid for authentication.
## The Next Steps
Now that you have your API key, you can start making requests to the Scan Documents API.
Start by uploading a file and operating on it. See our [Quick Start Guide](/docs/guides/quickstart) for more information on how to do this.
# Errors
URL: /docs/errors
Errors returned by Scan Documents API
***
title: Errors
description: Errors returned by Scan Documents API
icon: CircleX
-------------
## Overview
Scan Documents API uses conventional HTTP response codes to indicate the success or failure of an API request. In general:
* Codes in the `2XX` range indicate success.
* Codes in the `4XX` range indicate problems with the request, like missing parameters.
* Codes in the `5XX` range indicate problems with Scan Documents servers.
Errors messages conform to [RFC 7807](https://datatracker.ietf.org/doc/html/rfc7807) and use a `Content-Type` of `application/problem+json`.
## General Errors
This payload is for 4XX client errors, except validation errors, and 5XX errors.
A URL that identifies the problem type. Visit the URL to learn more about this problem.
A short, human-readable summary of the problem type.
The HTTP status code generated by the server for this occurrence of the problem.
A human-readable explanation specific to this occurrence of the problem.
### Example
Here is an example of a 404 error response when a file is not found:
```json
{
"type": "https://scan-documents.com/docs/api/errors/not-found",
"title": "Not Found",
"status": 404,
"message": "File with id file_123 not found."
}
```
## Validation Errors
This payload is for 4XX client errors that are caused by validation errors.
A URL that identifies the problem type. Visit the URL to learn more about this problem.
A short, human-readable summary of the problem type.
The HTTP status code generated by the server for this occurrence of the problem.
A human-readable explanation specific to this occurrence of the problem.
Error messages for the field that caused the validation error.
### Example
Here is an example of a 422 error response when there is a validation error:
```json
{
"type": "https://scan-documents.com/docs/api/errors/validation-error",
"title": "Validation Error",
"status": 422,
"errors": {
"input": ["input does not contains a valid input id."]
}
}
```
# Welcome
URL: /docs
Welcome to Scan Documents API Documentation
***
title: Welcome
description: Welcome to Scan Documents API Documentation
icon: Hand
----------
This is the documentation for the Scan Documents API. This powerful API provides a wide range of image
and document processing capabilities, allowing you to easily integrate advanced scanning and recognition features into your applications
with minimal effort in order to digitally transform your documents
## Key Features
The Scan Documents API offers a variety of features to help you process and analyze documents effectively. Some of the key features include:
} title="File Storage">
Upload and store files securely in the cloud
} title="Document Detection">
Get the bounding box and coordinates of the edges of documents in images
} title="Rasterize PDFs">
Convert PDF files to images for easier processing and analysis
} title="Merge into PDF">
Combine multiple images and PDFs into a single PDF document
} title="Warp Images">
Warp images to correct perspective distortions
} title="Extract Text">
Extract text from images in Markdown, Plain Text, HTML, and JSON formats
} title="Extract Pages">
Create a new PDF document by extracting specific pages from an existing PDF
} title="Split PDF">
Separate a PDF document into individual pages
} title="Image Conversion">
Convert images to WebP, PNG, JPEG, and PDF formats
} title="Apply Effects">
Apply various filters to images for enhanced visual effects
## Current Limitations
Scan Documents API is designed to be a simple, easy-to-use, and fast image processing API.
Due to this, there are some limitations to the API:
* The **maximum file** size for uploads is 10MB.
* The **maximum image dimensions** are 10,000 x 10,000 pixels.
* The current **supported formats** are JPEG, PNG, WebP, and PDF.
## Get Started
Do you like what you see? You can get started with the Scan Documents API in just a few minutes. Follow these steps to begin:
} title="Get your API Key">
Sign up for an account and obtain your API key to access the API
} title="Understand the API">
Check out how the API endpoints and webhooks work
} title="Start using the API">
Quickstart guide to help you integrate the API into your application
# Pagination
URL: /docs/pagination
Learn how to paginate through the results of the API
***
title: Pagination
description: Learn how to paginate through the results of the API
icon: List
----------
## Overview
All endpoints that list objects provide support for pagination.
This allows you to retrieve a subset of the results at a time, making it easier to manage large datasets.
Paginated responses return items in reverse chronological order, such that the most recently created object
will be returned first on the list and the oldest will be returned last.
The result includes a link object with a previous and a next attribute. Do a `GET` request to the URLs in
those attributes to fetch the previous or next page of results.
## Request Attributes
The following attributes can be used to control pagination in your requests:
The number of items to return per page.
The cursor indicating where to start fetching the next set of results. It corresponds to the ID of the first item on the current page.
If not provided, the API will start fetching from the newest item.
## Response Structure
The paginated response has the following structure:
```json
{
"data": [...],
"links": {
"previous": "",
"next": ""
}
}
```
## Response Attributes
Here's a breakdown of the attributes in the response:
The list of items for the current page.
URLs to navigate to the previous and next pages.
The URL to fetch the previous page of results.
The URL to fetch the next page of results.
Treat these URLs as a opaque strings. Do not try to parse or construct it.
# Webhooks
URL: /docs/webhooks
Learn how to receive events in your webhook endpoint
***
title: Webhooks
description: Learn how to receive events in your webhook endpoint
icon: Webhook
-------------
## Overview
Use webhooks to receive real-time events from your Scan Documents API activity, so your backend can respond to these events and act accordingly.
Receiving webhook events is useful for handling asynchronous events such as operation completion, file deletion, or any other event that may occur in the Scan Documents API.
## Setting Up Webhooks
You can receive events by registering a webhook endpoint in the [Dashboard](https://dashboard.scan-documents.com/webhooks). You can register different webhook endpoints and select the [specific events](/docs/events) to subscribe to for each endpoint.

## Events
When an event happens, Scan Documents creates a new [Event object](/docs/events). This event
triggers a webhook notification if user has registered a webhook endpoint and subscribed to the event type.
This is an example of an event object for a `file.deleted` event:
```json
{
"data": {
"id": "file_y9f6oitmeoncvcou",
"name": "file-example",
"type": "image/png",
},
"id": "event_wal69rzpapqrm7yj",
"timestamp": "2025-04-12T15:55:19.000Z",
"type": "file.deleted"
}
```
Learn more about the different [types of events](/docs/events).
## Event Delivery
Scan Documents API delivers the event via a `POST` request to your webhook endpoint, with the [Event object](/docs/events) as the JSON payload.
Delivery is successful if your endpoint responds with a status code in the `2XX` range (`200` to `299`). Any other status code means the delivery failed.
In order to prevent timeouts, please ensure your endpoint responds within 5 seconds. If your endpoint takes longer than that, try
to enqueue the event for processing and respond with a `202 Accepted` status code.
Scan Documents API does not guarantee the order of event delivery, so your endpoint should be able to handle events arriving out of order.
## Retries
If your endpoint responds with a status code outside the `2XX` range, Scan Documents API will keep trying to deliver the event for up to 48 hours, using an exponential backoff strategy.
## Authentication
Webhook notifications are secured with an HMAC signature included in the `svix-signature` header.
You can find the Signing Secret in the right column of the webhook endpoint definition:
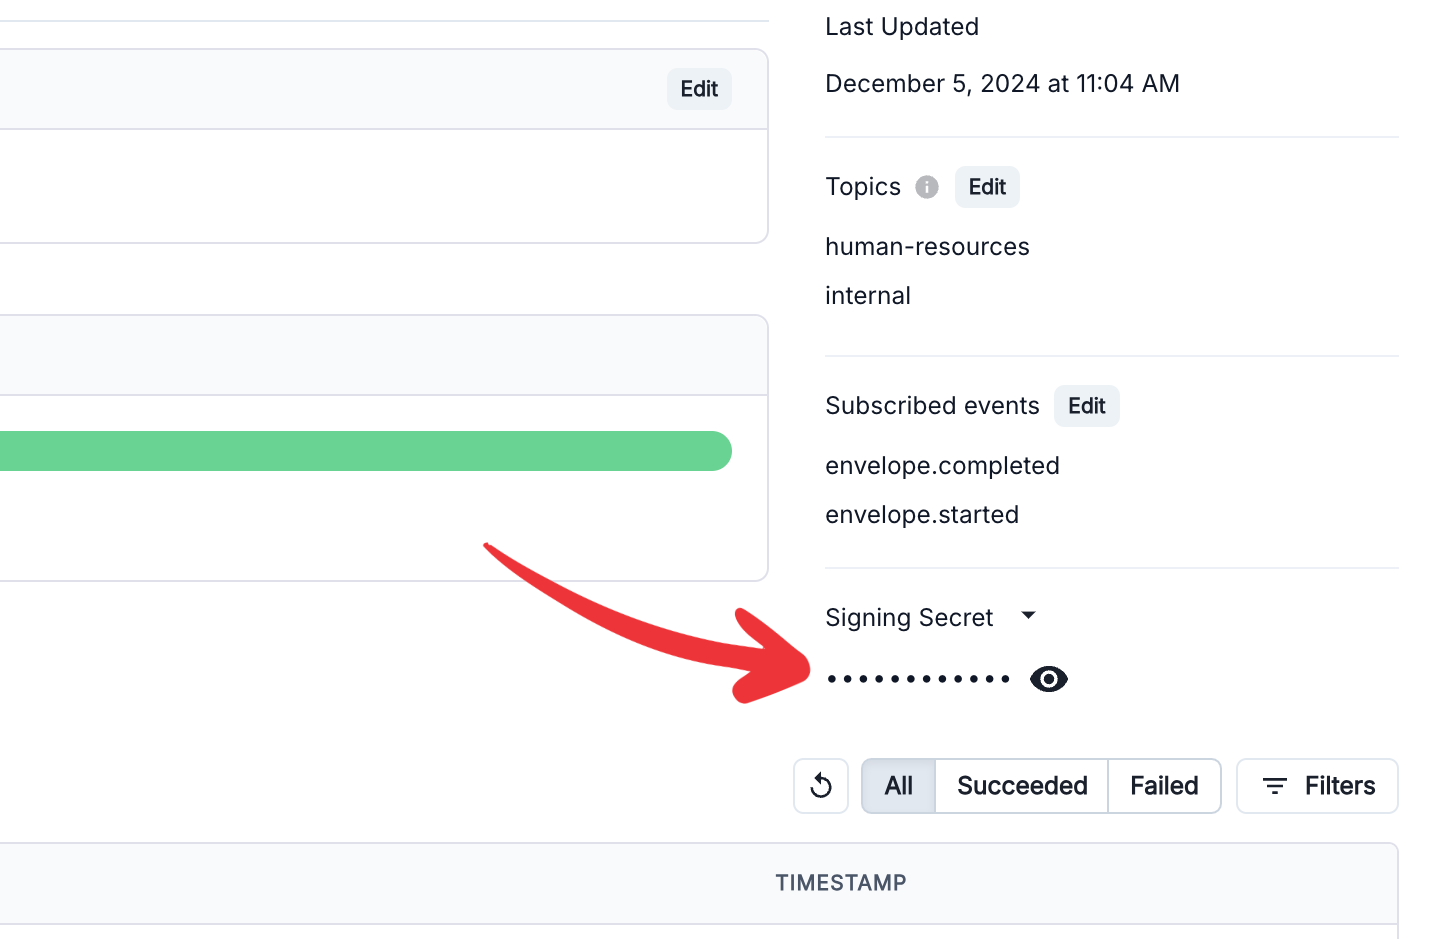
You can check how to verify the signature of the webhook in the [Svix documentation](https://docs.svix.com/receiving/verifying-payloads/how-manual).
## Tools
These tools can be useful for testing webhooks:
* [**Webhook.site**](https://webhook.site/): Generates a random endpoint URL and lets you inspect `POST` requests sent to that endpoint.
* [**ngrok**](https://ngrok.com/): Sets up a tunnel from an internet-facing endpoint to your local machine, allowing you to process webhooks locally.
* [**Cloudflare**](https://developers.cloudflare.com/pages/how-to/preview-with-cloudflare-tunnel/): Sets up a tunnel from an internet-facing endpoint to your local machine, allowing you to process webhooks locally.
## Webhooks vs Callback URLs
Scan Documents API in addition to webhooks, also supports callback URLs to receive notifications about task completion or failure.
Callback URLs are useful for simple use cases and integration with some automation tools, but they are not as flexible or powerful as webhooks.
Webhooks have several advantages over callback URLs:
* **Event-Driven**: Webhooks are event-driven, meaning they can notify you of various events in real-time, such as file uploads, deletions, or task completions. Callback URLs just return the task as it
was a `GET` request to the [Get Task](/docs/v1/tasks/id/get) endpoint.
* **Multiple Events**: Webhooks can deliver multiple types of events, while callback URLs are limited to task completion or failure notifications.
* **Retry Mechanism**: Webhooks have a built-in retry mechanism, while callback URLs do not.
* **Security**: Webhooks use HMAC signatures to verify the authenticity of the event, while callback URLs do not have this level of security.
* **Custom Payloads**: Webhooks can include a mechanism to transform payloads, while callback URLs do not have this feature.
* **Event Filtering**: Webhooks allow you to filter events by type, while callback URLs do not have this feature.
* **Custom Headers**: Webhooks allow you to include custom headers in the event, while callback URLs do not have this feature.
* **Event History**: Webhooks provide an event history, allowing you to see all events that have been delivered to your endpoint, while callback URLs do not have this feature.
If you don't need the advanced features of webhooks, you can use callback URLs for simple use cases. However,
if you need more flexibility and control over the events you receive, webhooks are the way to go.
# AI Agents
URL: /docs/ai-toolkit/agents
Enable your AI agents to manage documents operations with Scan Documents API.
***
title: AI Agents
description: 'Enable your AI agents to manage documents operations with Scan Documents API.'
icon: 'Bot'
-----------
## Introduction
[Model Context Protocol (MCP)](https://modelcontextprotocol.io/introduction) is an open protocol to standardize how applications provide context to LLMs.
Scan Documents provides an MCP server to enable AI agents to manage documents operations using the Scan Documents API.
This page describes the tools available in Scan Documents’s MCP server, which allows AI agents to interact with the Scan Documents platform.
## Currently available tools
Tools are individual operations exposed by the Scan Documents MCP server.
Each tool corresponds to a specific API capability, such as uploading an image, resizing it, or removing its background.
These tools are grouped by resource type and can be invoked by LLM agents through the MCP protocol.
| Tool Name | Operation | Resource | Maps To |
| ----------------------------------- | --------- | ------------------------------------------------- | -------------------------------------------------------------- |
| `retrieve_files` | `read` | [files](/docs/files) | [Get File Details](/docs/v1/files/id/get) |
| `list_files` | `read` | [files](/docs/files) | [List Files](/docs/v1/files/get) |
| `delete_files` | `write` | [files](/docs/files) | [Delete File](/docs/v1/files/id/delete) |
| `download_files` | `read` | [files](/docs/files) | [Download File Content](/docs/v1/files/id/download) |
| `upload_files` | `write` | [files](/docs/files) | [Upload File](/docs/v1/files/post) |
| `retrieve_tasks` | `read` | [tasks](/docs/tasks) | [Get Task Details](/docs/v1/tasks/id/get) |
| `list_tasks` | `read` | [tasks](/docs/tasks) | [List Tasks](/docs/v1/tasks/get) |
| `list_events` | `read` | [events](/docs/events) | [List Events](/docs/v1/events/get) |
| `apply_effect_image_operations` | `write` | [image\_operations](/docs/tasks#image-operations) | [Apply Image Effect](/docs/v1/image-operations/apply-effect) |
| `convert_image_operations` | `write` | [image\_operations](/docs/tasks#image-operations) | [Convert Image](/docs/v1/image-operations/convert) |
| `detect_documents_image_operations` | `write` | [image\_operations](/docs/tasks#image-operations) | [Detect Documents](/docs/v1/image-operations/detect-documents) |
| `extract_text_image_operations` | `write` | [image\_operations](/docs/tasks#image-operations) | [Extract Image Text](/docs/v1/image-operations/extract-text) |
| `warp_image_operations` | `write` | [image\_operations](/docs/tasks#image-operations) | [Warp Image](/docs/v1/image-operations/warp) |
| `extract_pages_pdf_operations` | `write` | [pdf\_operations](/docs/tasks#pdf-operations) | [Extract PDF Pages](/docs/v1/pdf-operations/extract-pages) |
| `merge_pdf_operations` | `write` | [pdf\_operations](/docs/tasks#pdf-operations) | [Merge PDFs](/docs/v1/pdf-operations/merge) |
| `render_pdf_operations` | `write` | [pdf\_operations](/docs/tasks#pdf-operations) | [Render PDF Pages](/docs/v1/pdf-operations/render) |
| `split_pdf_operations` | `write` | [pdf\_operations](/docs/tasks#pdf-operations) | [Split PDF](/docs/v1/pdf-operations/split) |
## Installation
### Direct invocation
You can run the MCP Server directly via `npx`:
```sh
export SCAN_DOCUMENTS_API_KEY="My API Key"
npx -y scan-documents-mcp@latest
```
### Via MCP Client
There is a partial list of existing clients at [modelcontextprotocol.io](https://modelcontextprotocol.io/clients). If you already
have a client, consult their documentation to install the MCP server.
For clients with a configuration JSON, it might look something like this:
```json
{
"mcpServers": {
"scan_documents_api": {
"command": "npx",
"args": ["-y", "scan-documents-mcp", "--client=claude", "--tools=all"],
"env": {
"SCAN_DOCUMENTS_API_KEY": "My API Key"
}
}
}
}
```
## Exposing endpoints to your MCP Client
There are two ways to expose endpoints as tools in the MCP server:
1. Exposing one tool per endpoint, and filtering as necessary
2. Exposing a set of tools to dynamically discover and invoke endpoints from the API
### Filtering endpoints and tools
You can run the package on the command line to discover and filter the set of tools that are exposed by the
MCP Server. This can be helpful for large APIs where including all endpoints at once is too much for your AI's
context window.
You can filter by multiple aspects:
* `--tool` includes a specific tool by name
* `--resource` includes all tools under a specific resource, and can have wildcards, e.g. `my.resource*`
* `--operation` includes just read (get/list) or just write operations
### Dynamic tools
If you specify `--tools=dynamic` to the MCP server, instead of exposing one tool per endpoint in the API, it will
expose the following tools:
1. `list_api_endpoints` - Discovers available endpoints, with optional filtering by search query
2. `get_api_endpoint_schema` - Gets detailed schema information for a specific endpoint
3. `invoke_api_endpoint` - Executes any endpoint with the appropriate parameters
This allows you to have the full set of API endpoints available to your MCP Client, while not requiring that all
of their schemas be loaded into context at once. Instead, the LLM will automatically use these tools together to
search for, look up, and invoke endpoints dynamically. However, due to the indirect nature of the schemas, it
can struggle to provide the correct properties a bit more than when tools are imported explicitly. Therefore,
you can opt-in to explicit tools, the dynamic tools, or both.
See more information with `--help`.
All of these command-line options can be repeated, combined together, and have corresponding exclusion versions (e.g. `--no-tool`).
Use `--list` to see the list of available tools, or see below.
### Specifying the MCP Client
Different clients have varying abilities to handle arbitrary tools and schemas.
You can specify the client you are using with the `--client` argument, and the MCP server will automatically
serve tools and schemas that are more compatible with that client.
* `--client=`: Set all capabilities based on a known MCP client
* Valid values: `openai-agents`, `claude`, `claude-code`, `cursor`
* Example: `--client=cursor`
Additionally, if you have a client not on the above list, or the client has gotten better
over time, you can manually enable or disable certain capabilities:
* `--capability=`: Specify individual client capabilities
* Available capabilities:
* `top-level-unions`: Enable support for top-level unions in tool schemas
* `valid-json`: Enable JSON string parsing for arguments
* `refs`: Enable support for $ref pointers in schemas
* `unions`: Enable support for union types (anyOf) in schemas
* `formats`: Enable support for format validations in schemas (e.g. date-time, email)
* `tool-name-length=N`: Set maximum tool name length to N characters
* Example: `--capability=top-level-unions --capability=tool-name-length=40`
* Example: `--capability=top-level-unions,tool-name-length=40`
### Examples
1. Filter for read operations on cards:
```bash
--resource=cards --operation=read
```
2. Exclude specific tools while including others:
```bash
--resource=cards --no-tool=create_cards
```
3. Configure for Cursor client with custom max tool name length:
```bash
--client=cursor --capability=tool-name-length=40
```
4. Complex filtering with multiple criteria:
```bash
--resource=cards,accounts --operation=read --tag=kyc --no-tool=create_cards
```
## Importing the tools and server individually
```js
// Import the server, generated endpoints, or the init function
import { server, endpoints, init } from "scan-documents-mcp/server";
// import a specific tool
import retrieveFiles from "scan-documents-mcp/tools/files/retrieve-files";
// initialize the server and all endpoints
init({ server, endpoints });
// manually start server
const transport = new StdioServerTransport();
await server.connect(transport);
// or initialize your own server with specific tools
const myServer = new McpServer(...);
// define your own endpoint
const myCustomEndpoint = {
tool: {
name: 'my_custom_tool',
description: 'My custom tool',
inputSchema: zodToJsonSchema(z.object({ a_property: z.string() })),
},
handler: async (client: client, args: any) => {
return { myResponse: 'Hello world!' };
})
};
// initialize the server with your custom endpoints
init({ server: myServer, endpoints: [retrieveFiles, myCustomEndpoint] });
```
# Context7
URL: /docs/ai-toolkit/context7
Intelligent development with AI-augmented context
***
title: Context7
description: Intelligent development with AI-augmented context
icon: Plug
----------
## What is Context7?
LLMs rely on outdated or generic information about the libraries you use.
[Context7](https://context7.com/) pulls up-to-date, version-specific documentation and code examples directly
from the source. Paste accurate, relevant documentation directly into tools like Cursor,
Claude, or any LLM. Get better answers, no hallucinations and an AI that actually
understands your stack.
## How to use Context7 with Scan Documents?
To use Context7 with Scan Documents, you can follow these steps:
1. **Install the Context7 MCP Server**: Check out the [Installation Guide](https://github.com/upstash/context7?tab=readme-ov-file#%EF%B8%8F-installation)
for detailed instructions on how to set up the Context7 in your preferred environment.
2. **Prompt the AI**: Use the `context7` tool in your AI development agent to provide the necessary context. End your prompt with `use context7`.
```
Create a function that uses Scan Documents to render a pdf file. use context7
```
3. **AI Response**: The AI will respond with a code snippet that uses the Scan Documents API to render a pdf file.
### Example: Render PDF pages as images Agent response
Below is a ready-to-use TypeScript helper that calls the Scan Documents `POST /v1/pdf-operations/render` endpoint to rasterize (render) specific pages of a PDF into images. It returns the created task; you can poll the task (or rely on the provided callback URL) to obtain the rendered image outputs once processing completes.
```ts
/**
* Creates a render task to convert PDF pages into images.
* Returns the task JSON described in the API docs.
*/
export async function renderPdf({
apiKey,
fileId,
pages,
dpi = 300,
callbackUrl,
apiBase = "https://api.scan-documents.com",
}: {
apiKey: string; // Your Scan Documents API key
fileId: `file_${string}` | `task_${string}`; // Source file (or prior task output) id
pages?: string; // Optional pages spec (e.g. "1", "1-3", "1,3,5", "1,3-5")
dpi?: number; // Optional DPI (72-600, default 300)
callbackUrl: string; // Your webhook to receive task completion events
apiBase?: string; // Override base URL for self-host / staging
}) {
const res = await fetch(`${apiBase}/v1/pdf-operations/render`, {
method: "POST",
headers: {
Authorization: `Bearer ${apiKey}`,
"Content-Type": "application/json",
},
body: JSON.stringify({
input: fileId,
pages, // optional
dpi, // optional, defaults to 300
callback_url: callbackUrl,
}),
});
if (!res.ok) {
const errBody = await res.json().catch(() => undefined);
throw new Error(`Render task failed (${res.status}): ${JSON.stringify(errBody)}`);
}
return res.json();
}
// Example usage:
// const task = await renderPdf({
// apiKey: process.env.SCAN_DOCS_API_KEY!,
// fileId: "file_avyrvozb9302uwhq",
// pages: "1-3,5",
// dpi: 300,
// callbackUrl: "https://yourapp.com/webhooks/scan-documents",
// });
// console.log("Render task created:", task.id);
```
# Introduction
URL: /docs/ai-toolkit
Integrate AI with Scan Documents API
***
title: Introduction
description: Integrate AI with Scan Documents API
icon: House
-----------

This is the AI Toolkit for the Scan Documents API. Here you will find how to use the API with AI agents, LLMs, and other AI tools.
## Tools
Select the tool you want to use from the list below.
} title="AI Agents">
Integrate AI agents using the Model Context Protocol (MCP) to automate document digitization.
} title="LLM Context">
Provide context to large language models (LLMs) with the Scan Documents docs content.
# llms.txt
URL: /docs/ai-toolkit/llm
Make docs content easier for LLMs to read and index
***
title: llms.txt
description: Make docs content easier for LLMs to read and index
icon: Text
----------
## Introduction
The [llms.txt file](https://llmstxt.org) is an industry standard that helps LLMs index content more efficiently,
similar to how a sitemap helps search engines.
Scan Documents hosts an `llms.txt` file at the root of the docs that lists all available pages
in the documentation. AI tools can use this file to understand the documentation structure and find relevant
content to user prompts.
View the `llms.txt` by appending `/llms.txt` to the documentation site's URL.
```text
https://scan-documents.com/llms.txt
```
} title="Check out the llms.txt">
The llms.txt file for this site is automatically generated and updated.
### llms.txt structure
An `llms.txt` file is a plain Markdown file that contains:
* **Site title** as an H1 heading. This is the only required section of an `llms.txt`.
* **Structured content sections** with descriptive links to key pages.
```mdx Example llms.txt
## Scan Documents
## Docs
- [Introduction](/docs/guides): Scan Documents API Guides
- [Quickstart](/docs/guides/quickstart): Quickstart guide for using the API
- [Introduction](/docs/integrations): Integrate No-Code tools with Scan Documents
- [AI Agents](/docs/ai-toolkit/agents): Enable your AI agents to manage documents operations with Scan Documents API.
- [Introduction](/docs/ai-toolkit): Integrate AI with Scan Documents API
```
This structured approach allows LLMs to quickly process the documentation hierarchy and locate relevant content for user queries, improving the accuracy and speed of AI-assisted documentation searches.
### llms-full.txt
The `llms-full.txt` file combines the entire documentation site into a single file as context for AI tools and is indexed by LLM traffic.
You can paste a single URL as context for AI tools for more relevant and accurate responses.
Scan Documents hosts an `llms-full.txt` file at the root of the docs.
View the `llms-full.txt` by appending `/llms-full.txt` to the documentation URL.
```text
https://scan-documents.com/llms-full.txt
```
} title="Check out the llms-full.txt">
The llms-full.txt file for this site is automatically generated and updated.
# Automated Expense Reporting
URL: /docs/guides/automated-expense-reporting
Learn how to automate expense reporting by extracting structured data from receipts.
***
title: Automated Expense Reporting
description: Learn how to automate expense reporting by extracting structured data from receipts.
icon: Receipt
-------------
Manually entering data from receipts is a time-consuming and error-prone task. With the Scan Documents API, you can automate this process by extracting structured data from your receipts, saving you time and improving accuracy.
This guide will walk you through the process of creating an automated expense reporting solution using the Scan Documents API.
} title="See in Postman">
This guide's API calls are available as a Postman collection. You can use it to quickly test the API and see how it works.
## Business Problem
Imagine you are building an expense management application. Your users need to be able to upload pictures of their receipts, and the application should automatically extract key information such as the vendor name, the date of the transaction, and the total amount.
## Solution
We can solve this problem by using a combination of the Scan Documents API's features:
1. **Digitize Document:** First, we'll digitize the receipt to improve its quality and make it easier to process.
2. **Extract Text:** Next, we'll extract the text from the digitized receipt.
3. **Structured Data Extraction:** Finally, we'll use the `extract-text` operation with a JSON schema to extract the required information in a structured format.
Let's get started!
### Step 1: Upload the Receipt
First, upload the receipt image to the Scan Documents API.
} title="Upload a File">
Creates a new file
```bash
curl -X POST "https://api.scan-documents.com/v1/files" \
-H "x-api-key: YOUR_API_KEY" \
-F name="Receipt" \
-F file="@/path/to/your/receipt.jpg"
```
It will respond with a file object:
```json
{
"id": "file_qgg1xpdhe3f4ot84",
"name": "Receipt",
"type": "image/webp",
"properties": {
"size": 11648,
"width": 250,
"height": 333
},
"task_id": null,
"created_at": "2025-08-23T15:15:04.000Z"
}
```
Take note of the `id` from the response, as you'll need it in the next steps.
### Step 2: Digitize the Receipt (optional)
To improve the accuracy of the text extraction, it's a good practice to first digitize the receipt. This involves detecting the document, warping it, and enhancing its colors.
You can do this by creating a `scan` task:
} title="Scan Document">
Creates a task to scan an image file. This is an equivalent operation for `detect-documents` and `warp` combined, additionally it can apply effects to the scanned image.
```bash
curl -X POST "https://api.scan-documents.com/v1/image-operations/scan"
-H "x-api-key: YOUR_API_KEY"
-H "Content-Type: application/json"
-d '{ "input": "file_ajw8fgkjlmzxrzz3", "name": "Digitized Receipt", "scan_mode": "standard", "effect": "none" }'
```
This will create a new, digitized image of the receipt. The `id` of the generated file will be in the task's result.
```json
{
"id": "task_xz9ud1dt9nuczdsm",
"operation": "scan",
"status": "completed",
"parameters": {
"input": "file_qgg1xpdhe3f4ot84",
"name": "Digitized Receipt",
"scan_mode": "standard",
"effect": "none"
},
"result": {
"generated_files": [
{
"id": "file_wak3m3cex63h6pak",
"name": "Digitized Receipt",
"type": "image/webp",
"properties": {
"size": 8040,
"width": 186,
"height": 313
},
"task_id": "task_xz9ud1dt9nuczdsm",
"created_at": "2025-08-23T15:15:18.000Z"
}
]
},
"callback_url": null,
"created_at": "2025-08-23T15:15:12.000Z",
"updated_at": "2025-08-23T15:15:19.000Z"
}
```
### Step 3: Extract Structured Data
Now comes the exciting part! We'll use the `extract-text` operation with a JSON schema to extract the vendor name, transaction date, and total amount from the receipt.
Here's the JSON schema we'll use:
```json
{
"type": "object",
"properties": {
"vendor": {
"type": "string",
"description": "The name of the vendor or store."
},
"date": {
"type": "string",
"description": "The date of the transaction in YYYY-MM-DD format."
},
"total": {
"type": "number",
"description": "The total amount of the transaction."
}
},
"required": ["vendor", "date", "total"]
}
```
Now, let's make the API call:
} title="Extract Text">
Creates a task to extract text from a specified image file.
```bash
curl -X POST "https://api.scan-documents.com/v1/image-operations/extract-text" \
-H "x-api-key: YOUR_API_KEY" \
-H "Content-Type: application/json" \
-d '{
"input": "file_wak3m3cex63h6pak",
"format": "json",
"schema": {
"type": "object",
"properties": {
"vendor": {
"type": "string",
"description": "The name of the vendor or store."
},
"date": {
"type": "string",
"description": "The date of the transaction in YYYY-MM-DD format."
},
"total": {
"type": "number",
"description": "The total amount of the transaction."
}
},
"required": ["vendor", "date", "total"]
}
}'
```
The result of this task will be a JSON object containing the extracted data:
```json
{
"id": "task_mlgn68yiwmeasvow",
"operation": "extract-text",
"status": "completed",
"parameters": {
"input": "file_wak3m3cex63h6pak",
"format": "json",
"schema": {
"type": "object",
"properties": {
"vendor": {
"type": "string",
"description": "The name of the vendor or store."
},
"date": {
"type": "string",
"description": "The date of the transaction in YYYY-MM-DD format."
},
"total": {
"type": "number",
"description": "The total amount of the transaction."
}
},
"required": [
"vendor",
"date",
"total"
]
}
},
"result": {
"format": "json",
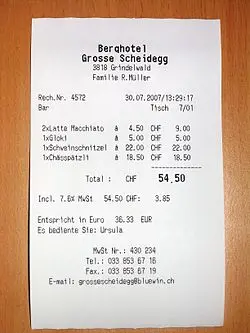
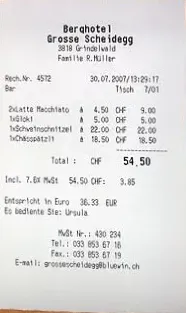
"content": "{\"vendor\": \"Berghotel\\nGrosse Scheidegg\", \"date\": \"2007-07-30\", \"total\": 54.5}"
},
"callback_url": null,
"created_at": "2025-08-23T15:23:03.000Z",
"updated_at": "2025-08-23T15:23:12.000Z"
}
```
If we parse the `content` field from the `result`, we get:
```json
{
"vendor": "Berghotel\nGrosse Scheidegg",
"date": "2007-07-30",
"total": 54.5
}
```
And that's it! You have successfully extracted structured data from a receipt. You can now use this data to populate your expense management application, saving your users from manual data entry.
# Convert Images to PDF
URL: /docs/guides/convert-images-to-pdf
Learn how to convert multiple images into a single PDF file.
***
title: Convert Images to PDF
description: Learn how to convert multiple images into a single PDF file.
icon: FileImage
---------------
In many business workflows, you may need to convert multiple images, such as scans of a multi-page document, into a single, easy-to-share PDF file. The Scan Documents API makes this process simple and efficient.
## Business Problem
Imagine you are working in an administrative role and need to compile a report from various scanned pages, which are currently saved as individual image files (e.g., JPEG, PNG). You need to combine these images into a single PDF document to ensure the pages are in the correct order and the file is easy to share and archive.
## Solution
We can solve this problem by using the Scan Documents API to render multiple images into a single PDF. Here’s how:
1. **Upload the Images:** First, you need to upload each image file to the Scan Documents API.
2. **Merge into PDF:** Then, you'll use the `merge` operation to combine the uploaded images into a single PDF file.
Let's get started!
### Step 1: Upload the Images
First, you need to upload each image file to the Scan Documents API. You will need to do this for each image you want to include in the PDF.
} title="Upload a File">
Creates a new file
```bash
# Upload the first image
curl -X POST "https://api.scan-documents.com/v1/files" \
-H "x-api-key: YOUR_API_KEY" \
-F name="Page 1" \
-F file="@/path/to/your/page1.jpg"
```
It will respond with a file object:
```json
{
"id": "file_abc123",
"name": "Page 1",
"type": "image/jpeg",
"properties": {
"size": 50000,
"width": 800,
"height": 1200
},
"task_id": null,
"created_at": "2025-08-23T10:00:00.000Z"
}
```
```bash
# Upload the second image
curl -X POST "https://api.scan-documents.com/v1/files" \
-H "x-api-key: YOUR_API_KEY" \
-F name="Page 2" \
-F file="@/path/to/your/page2.jpg"
```
It will respond with a file object:
```json
{
"id": "file_def456",
"name": "Page 2",
"type": "image/jpeg",
"properties": {
"size": 55000,
"width": 800,
"height": 1200
},
"task_id": null,
"created_at": "2025-08-23T10:01:00.000Z"
}
```
Take note of the `id` from each response, as you'll need them in the next step.
### Step 2: Merge Images into a PDF
Now that you have uploaded all your images, you can use the `merge` operation to combine them into a single PDF. You will need to provide the file IDs of the images in the order you want them to appear in the PDF.
} title="Merge files">
Creates a task to merge multiple files (images or PDFs) into a single PDF document.
```bash
curl -X POST "https://api.scan-documents.com/v1/pdf-operations/merge" \
-H "x-api-key: YOUR_API_KEY" \
-H "Content-Type: application/json" \
-d '{
"name": "My Document.pdf",
"input": [
"file_abc123",
"file_def456"
]
}'
```
The result of this task will be a new PDF file containing your images.
```json
{
"id": "task_ghi789",
"operation": "merge",
"status": "completed",
"parameters": {
"name": "My Document.pdf",
"input": [
"file_abc123",
"file_def456"
]
},
"result": {
"generated_files": [
{
"id": "file_jkl012",
"name": "My Document.pdf",
"type": "application/pdf",
"properties": {
"size": 102400,
"page_count": 2
},
"task_id": "task_ghi789",
"created_at": "2025-08-23T10:05:00.000Z"
}
]
},
"callback_url": null,
"created_at": "2025-08-23T10:04:00.000Z",
"updated_at": "2025-08-23T10:05:00.000Z"
}
```
And that's it! You can now download the generated PDF file using the `/v1/files/{id}/download` endpoint. This single PDF file is now ready for sharing or archiving, with all pages in the correct order.
# Digitize Document for Archiving
URL: /docs/guides/digitize-document
Learn how to digitize a physical document for digital archiving and search.
***
title: Digitize Document for Archiving
description: Learn how to digitize a physical document for digital archiving and search.
icon: ScanLine
--------------
This guide will walk you through the process of digitizing a physical document from an image. This is a common requirement for businesses that want to move to a paperless office, archive their documents, and make them easily searchable.
} title="See in Postman">
This guide's API calls are available as a Postman collection. You can use it to quickly test the API and see how it works.
## Business Problem
Imagine you work for a law firm that has thousands of physical case files. Finding a specific document can be a time-consuming process. The firm wants to create a digital archive of all its case files to make them easily searchable and accessible.
## Solution
We can solve this problem by using the Scan Documents API to digitize the physical documents and prepare them for archiving. The process involves:
1. **Uploading an Image:** Taking a picture of the document and uploading it to the API.
2. **Detecting the Document:** Automatically identifying the document within the image.
3. **Warping the Document:** Correcting the perspective of the document to make it look flat.
4. **Enhancing the Colors:** Improving the readability of the document by applying a scanner-like effect.
This process will result in a high-quality digital version of the physical document, which can then be stored in a document management system and indexed for full-text search.
### Step 1: Upload the Image
First, you need to upload the image containing the document to the Scan Documents API. You can do this by sending a `POST` request to the `/v1/files` endpoint.
} title="Upload a File">
Creates a new file
```bash
curl -X POST "https://api.scan-documents.com/v1/files" \
-H "x-api-key: YOUR_API_KEY" \
-F name="Case File p. 1" \
-F file="@/path/to/your/document.jpg"
```
The API will respond with a file object, which includes an ID for the uploaded file. You will use this ID in the next steps.
```json
{
"id": "file_glh4pbl2lbu59s07",
"name": "Case File p. 1",
"type": "image/webp",
"properties": {
"size": 265174,
"width": 2448,
"height": 3264
},
"task_id": null,
"created_at": "2025-08-20T20:00:05.000Z"
}
```
### Step 2: Detect the Document (or skip to [Scan Endpoint Alternative](#scan-endpoint-alternative))
Next, you need to detect the document in the uploaded image. You can do this by creating a `detect-documents` task.
} title="Detect Documents">
Creates a task to detect document boundaries within an image
```bash
curl -X POST "https://api.scan-documents.com/v1/image-operations/detect-documents" \
-H "x-api-key: YOUR_API_KEY" \
-H "Content-Type: application/json" \
-d '{
"input": "file_glh4pbl2lbu59s07"
}'
```
The API will respond with a task object. Once the task is completed, its `result` will contain the coordinates of the detected document.
```json
{
"id": "task_vxjynjez5nw8didz",
"operation": "detect-documents",
"status": "completed",
"parameters": {
"input": "file_glh4pbl2lbu59s07",
"scan_mode": "standard"
},
"result": {
"documents": [
{
"vertices": [
{
"x": 82,
"y": 646
},
{
"x": 1539,
"y": 394
},
{
"x": 2359,
"y": 2105
},
{
"x": 807,
"y": 2788
}
],
"bounding_box": {
"top": 394,
"left": 82,
"width": 2277,
"height": 2394
},
"file_id": "file_glh4pbl2lbu59s07"
}
]
},
"callback_url": null,
"created_at": "2025-08-22T19:58:00.000Z",
"updated_at": "2025-08-22T19:58:10.000Z"
}
```
### Step 3: Warp the Document
Now that you have the coordinates of the document, you can warp it to correct its perspective. This is done by creating a `warp` task.
} title="Warp Image">
Creates a task to warp an image using the specified vertices
```bash
curl -X POST "https://api.scan-documents.com/v1/image-operations/warp" \
-H "x-api-key: YOUR_API_KEY" \
-H "Content-Type: application/json" \
-d '{ "input": "file_glh4pbl2lbu59s07", "name": "Warped Document", "vertices": [ { "x": 82, "y": 646 }, { "x": 1539, "y": 394 }, { "x": 2359, "y": 2105 }, { "x": 807, "y": 2788 } ] }'
```
The result of this task will be a new image file with the warped document.
```json
{
"id": "task_jbm922sf4it82itr",
"operation": "warp",
"status": "completed",
"parameters": {
"input": "file_glh4pbl2lbu59s07",
"name": "Warped Document",
"vertices": [
{
"x": 82,
"y": 646
},
{
"x": 1539,
"y": 394
},
{
"x": 2359,
"y": 2105
},
{
"x": 807,
"y": 2788
}
]
},
"result": {
"generated_files": [
{
"id": "file_hvm5unqnr1d3xw8k",
"name": "Warped Document",
"type": "image/webp",
"properties": {
"size": 207270,
"width": 1695,
"height": 2261
},
"task_id": "task_jbm922sf4it82itr",
"created_at": "2025-08-22T20:02:00.000Z"
}
]
},
"callback_url": null,
"created_at": "2025-08-22T20:01:52.000Z",
"updated_at": "2025-08-22T20:02:01.000Z"
}
```
### Step 4: Enhance the Colors
Finally, you can enhance the colors of the warped document to make it look like a scanned document. This is done by creating an `apply-effect` task with the `scanner` effect.
} title="Apply Effect">
Creates a task to apply a predefined effect to an image
```bash
curl -X POST "https://api.scan-documents.com/v1/image-operations/apply-effect" \
-H "x-api-key: YOUR_API_KEY" \
-H "Content-Type: application/json" \
-d '{ "input": "file_hvm5unqnr1d3xw8k", "name": "Digitized Document", "effect": "scanner" }'
```
The result of this task will be the final digitized document.
```json
{
"id": "task_b9qw2rd4vcvug29k",
"operation": "apply-effect",
"status": "completed",
"parameters": {
"input": "file_hvm5unqnr1d3xw8k",
"name": "Digitized Document",
"effect": "scanner"
},
"result": {
"generated_files": [
{
"id": "file_jmjje3ut90btw1r9",
"name": "Digitized Document",
"type": "image/webp",
"properties": {
"size": 283188,
"width": 1695,
"height": 2261
},
"task_id": "task_b9qw2rd4vcvug29k",
"created_at": "2025-08-22T20:03:39.000Z"
}
]
},
"callback_url": null,
"created_at": "2025-08-22T20:03:31.000Z",
"updated_at": "2025-08-22T20:03:39.000Z"
}
```
You can now download the final image using the `/v1/files/{id}/download` endpoint. This digitized document is now ready to be archived and indexed for search.
## Scan Endpoint Alternative
The process described above is the most flexible, allowing you to customize each step. However, if you want a simpler approach, you can use the `scan` endpoint, which combines all the steps into a single API call.
} title="Scan Document">
Creates a task to scan an image file. This is an equivalent operation for `detect-documents` and `warp` combined, additionally it can apply effects to the scanned image.
```bash
curl -X POST "https://api.scan-documents.com/v1/image-operations/scan-image" \
-H "x-api-key: YOUR_API_KEY" \
-H "Content-Type: application/json" \
-d '{
"input": "file_glh4pbl2lbu59s07",
"name": "Scanned Document",
"scan_mode": "standard",
"effect": "scanner"
}'
```
The `scan` endpoint will automatically detect the document, warp it, and apply the scanner effect in one go. The result will be a digitized document ready for archiving.
```json
{
"id": "task_b9qw2rd4vcvug29k",
"operation": "apply-effect",
"status": "completed",
"parameters": {
"input": "file_hvm5unqnr1d3xw8k",
"name": "Digitized Document",
"effect": "scanner"
},
"result": {
"generated_files": [
{
"id": "file_jmjje3ut90btw1r9",
"name": "Digitized Document",
"type": "image/webp",
"properties": {
"size": 283188,
"width": 1695,
"height": 2261
},
"task_id": "task_b9qw2rd4vcvug29k",
"created_at": "2025-08-22T20:03:39.000Z"
}
]
},
"callback_url": null,
"created_at": "2025-08-22T20:03:31.000Z",
"updated_at": "2025-08-22T20:03:39.000Z"
}
```
You can then download the final digitized document using the `/v1/files/{id}/download` endpoint.
# Extract and Search Document Content
URL: /docs/guides/extract-text-from-document
Learn how to extract text from a document and make it searchable.
***
title: Extract and Search Document Content
description: Learn how to extract text from a document and make it searchable.
icon: ScanText
--------------
This guide will show you how to extract text from a document image and make it searchable. This is a powerful feature for any application that needs to work with the content of physical documents.
} title="See in Postman">
This guide's API calls are available as a Postman collection. You can use it to quickly test the API and see how it works.
## Business Problem
Let's continue with the law firm example from the previous guide. Now that the firm has digitized its case files, the next step is to make them searchable. A lawyer should be able to search for a specific term (e.g., a case number, a name, a legal term) and find all the relevant documents.
## Solution
We can achieve this by using the Scan Documents API to extract the text from the digitized documents. Here's the plan:
1. **Upload and Digitize:** First, we'll upload and digitize the document as we did in the previous guide.
2. **Extract Text:** Then, we'll use the `extract-text` operation to get the content of the document in plain text.
3. **Index for Search:** Finally, you can take the extracted text and store it in a search engine like Elasticsearch or a database that supports full-text search. This will allow your users to perform powerful searches on the content of their documents.
### Step 1: Upload and Digitize the Document
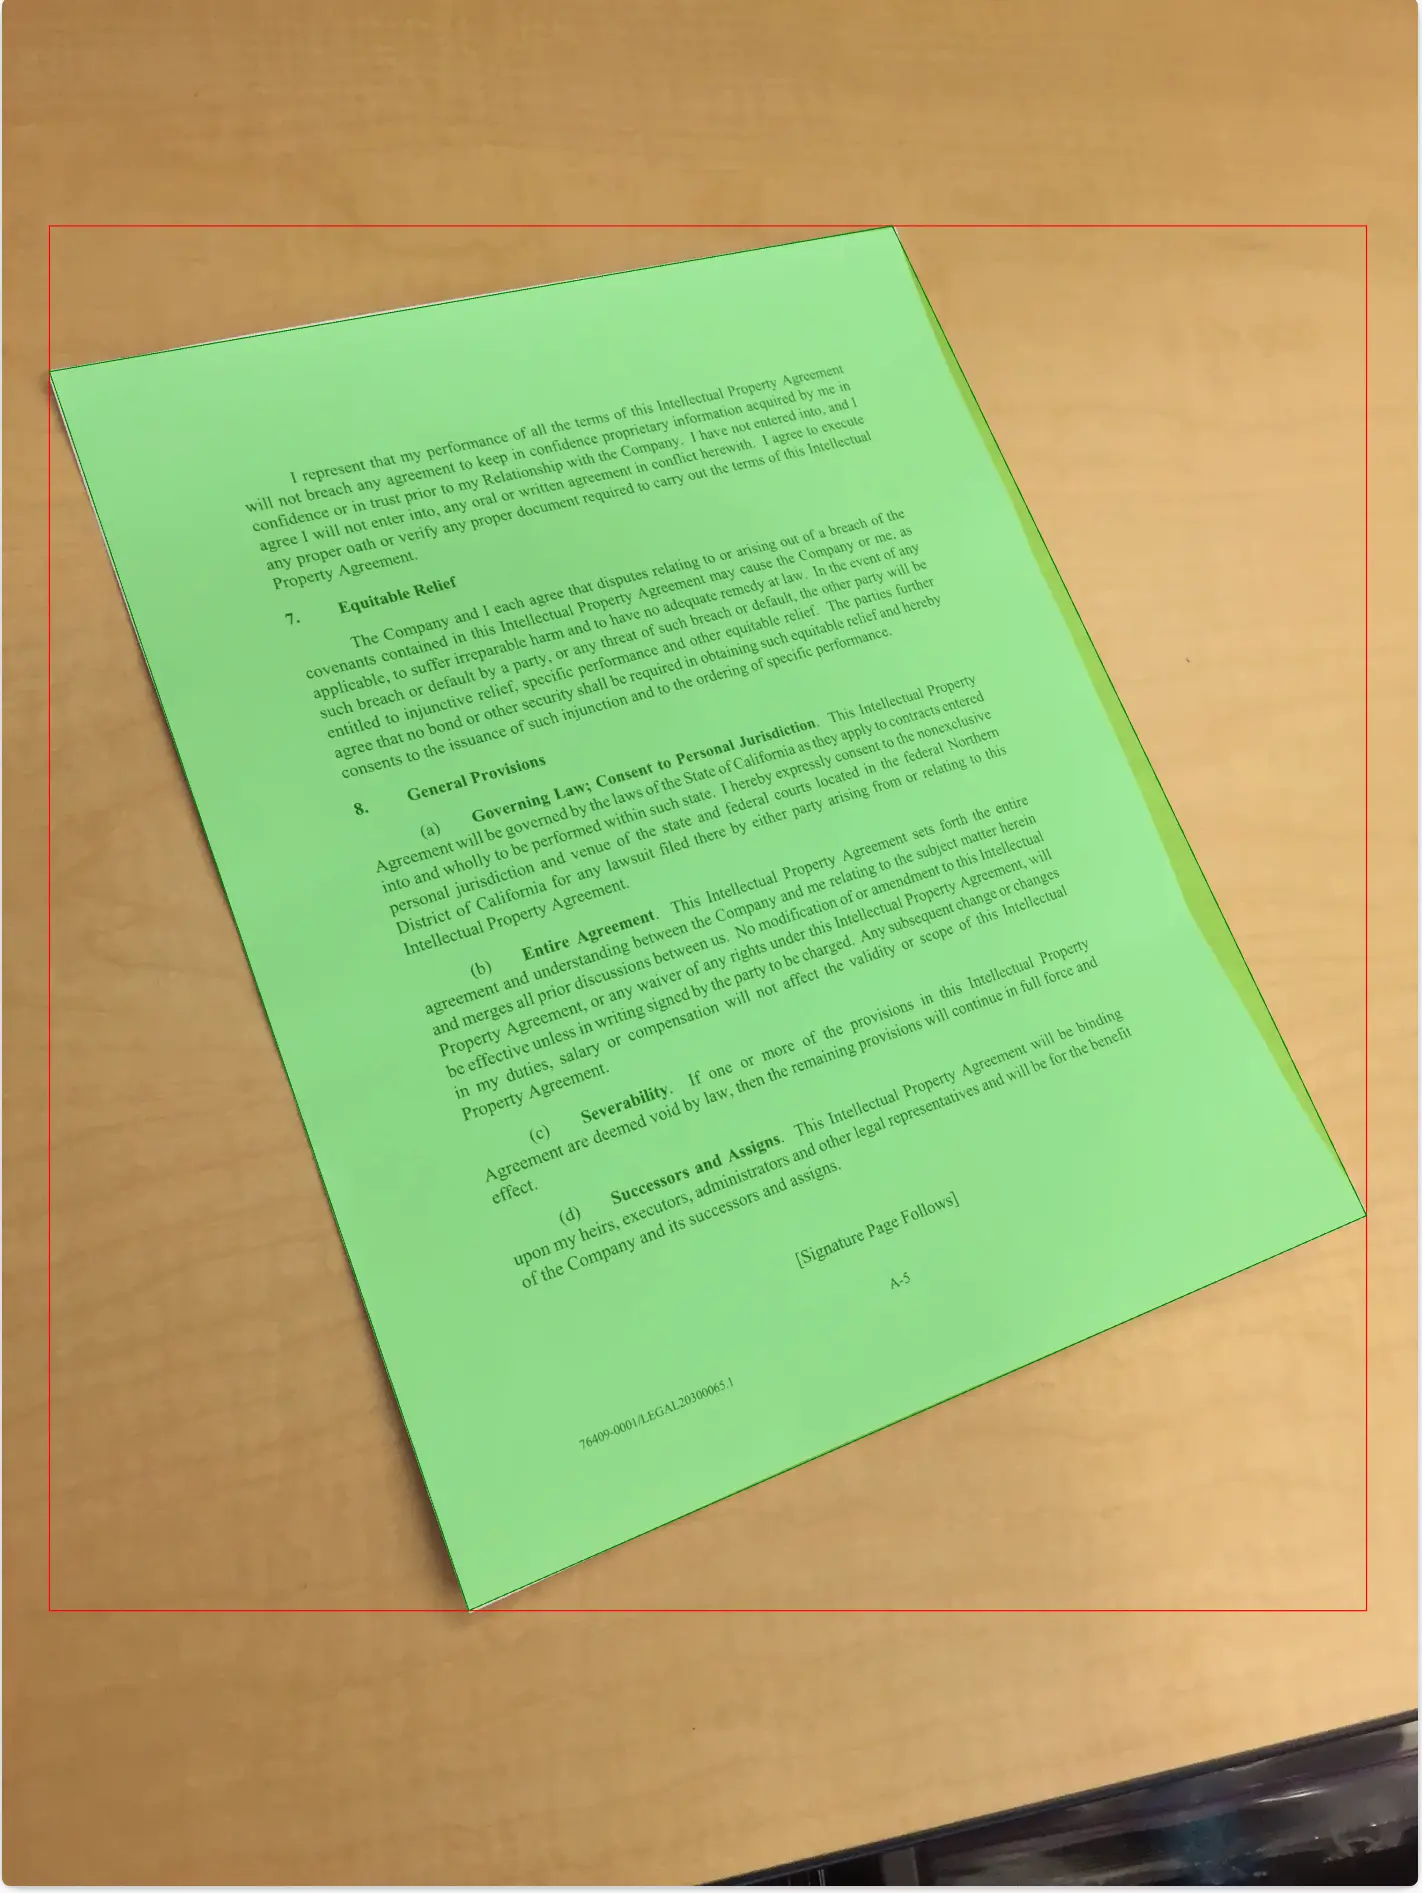
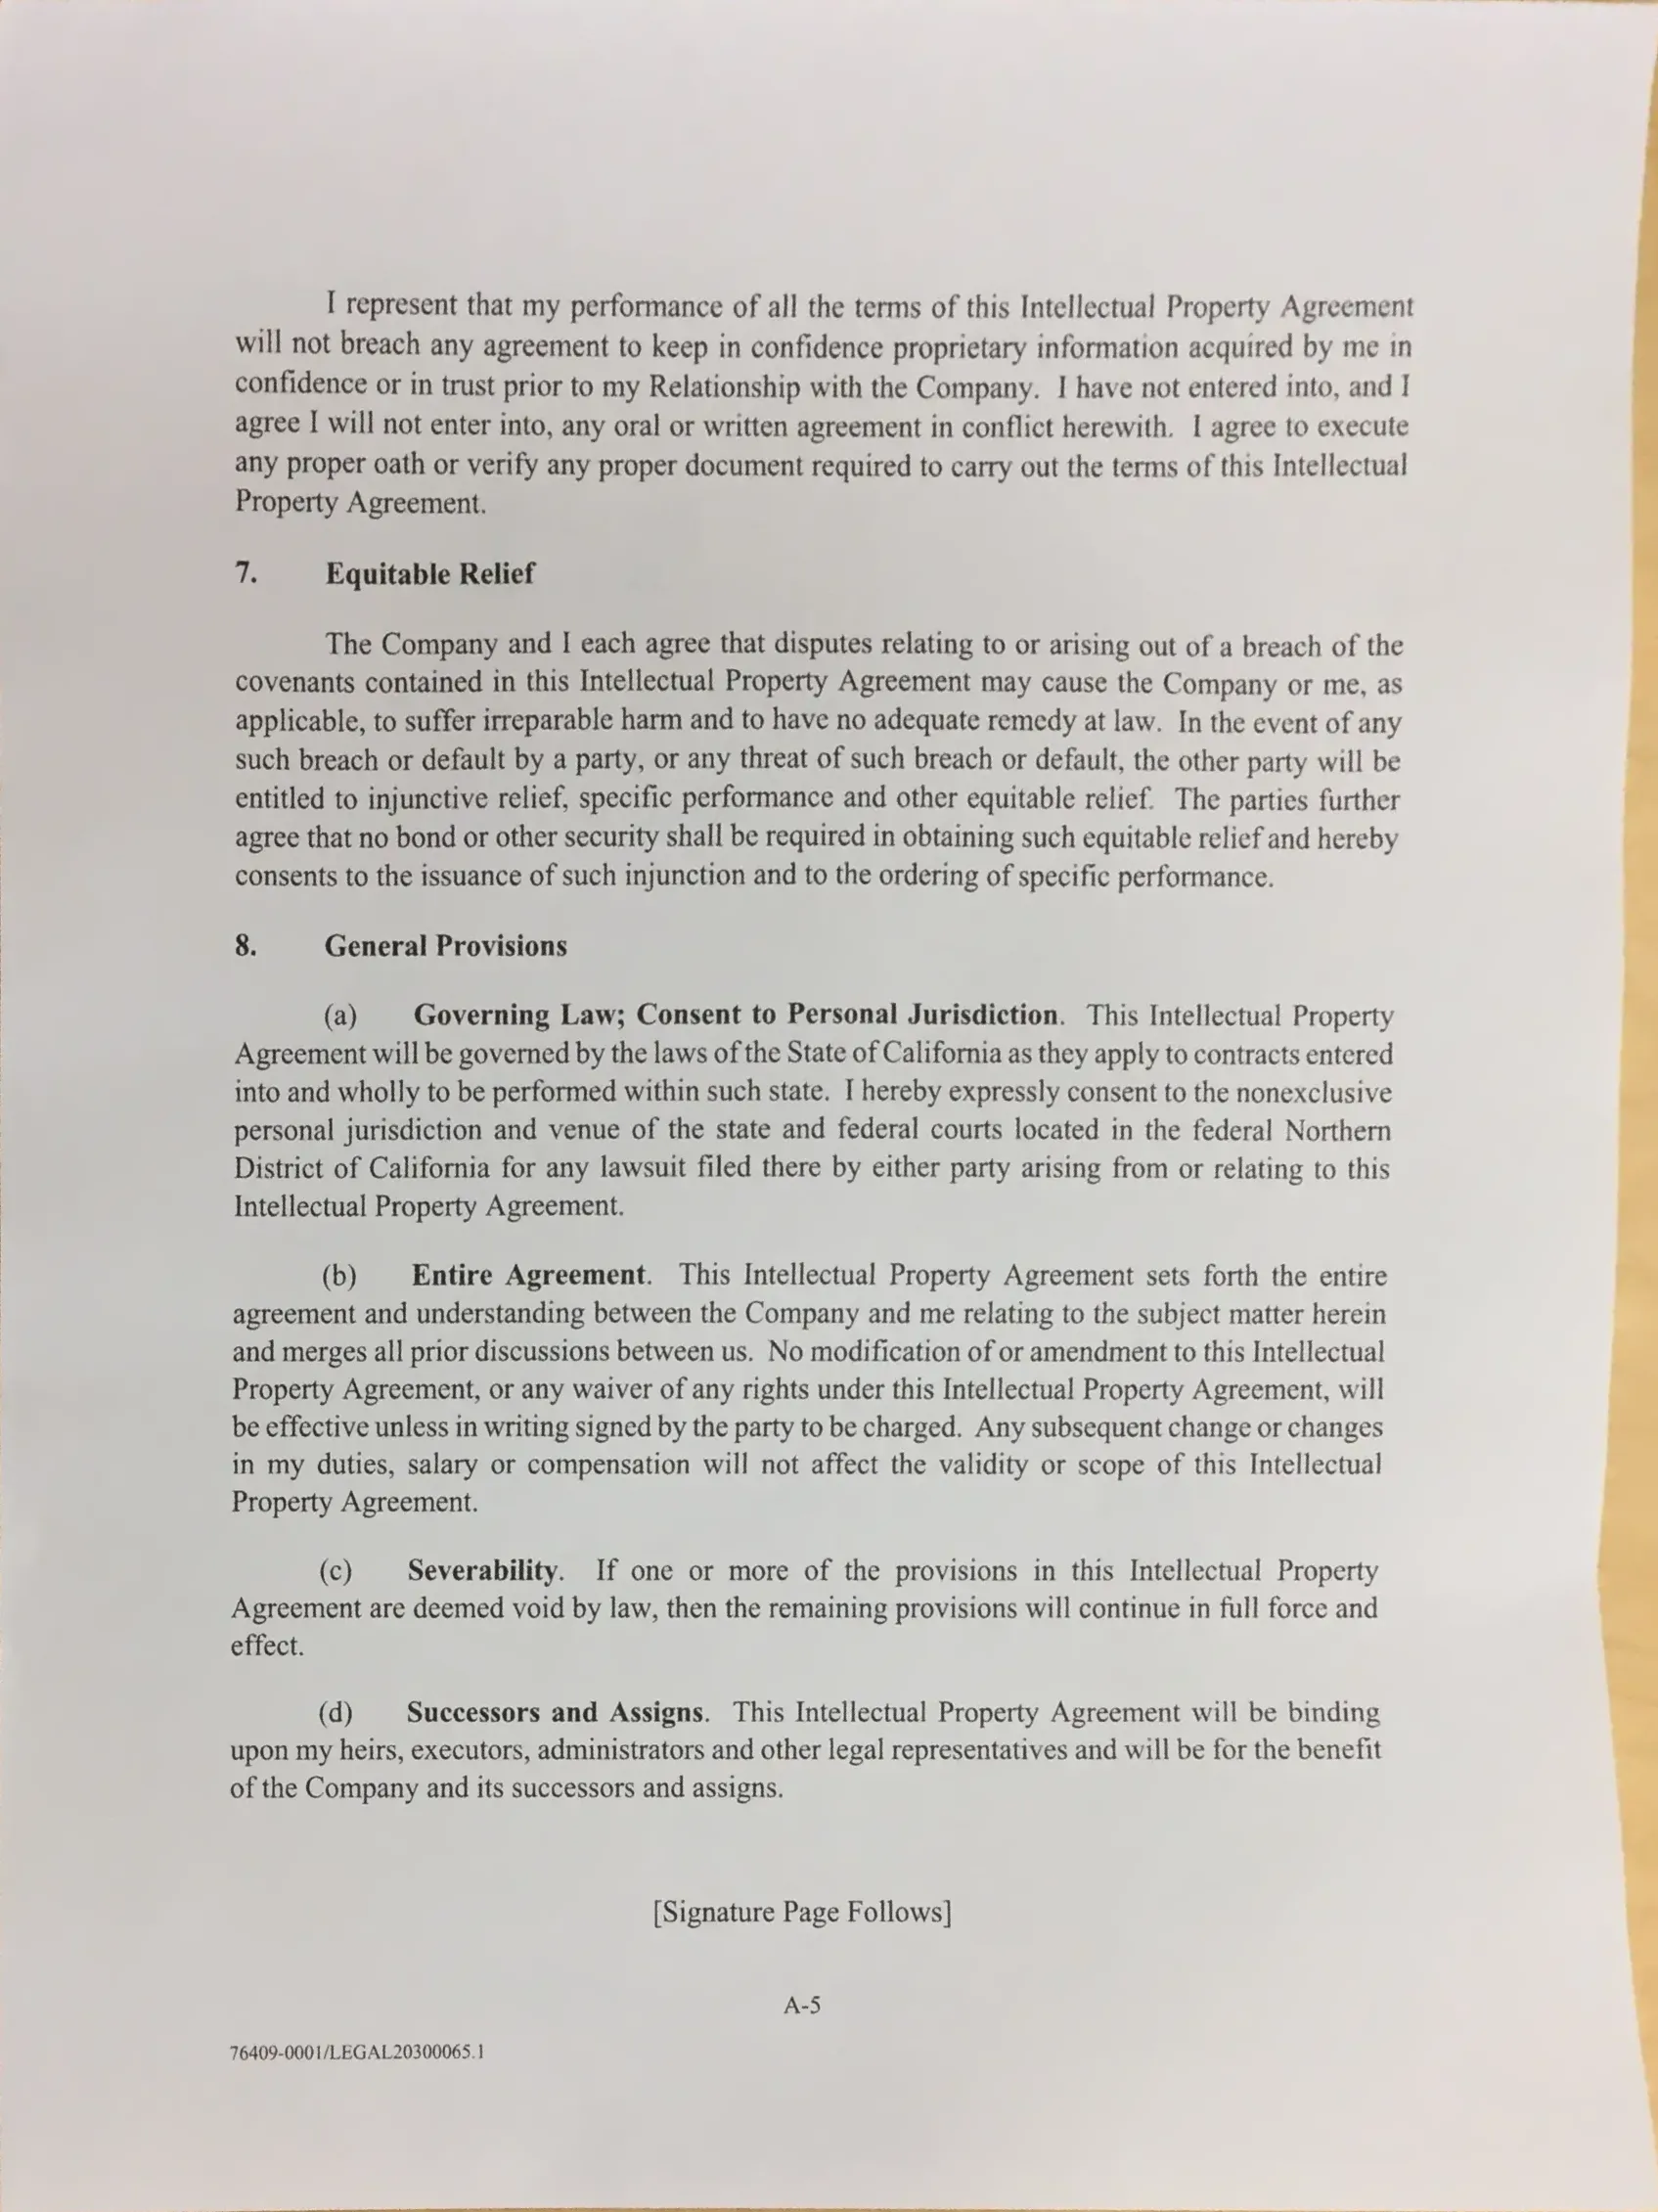
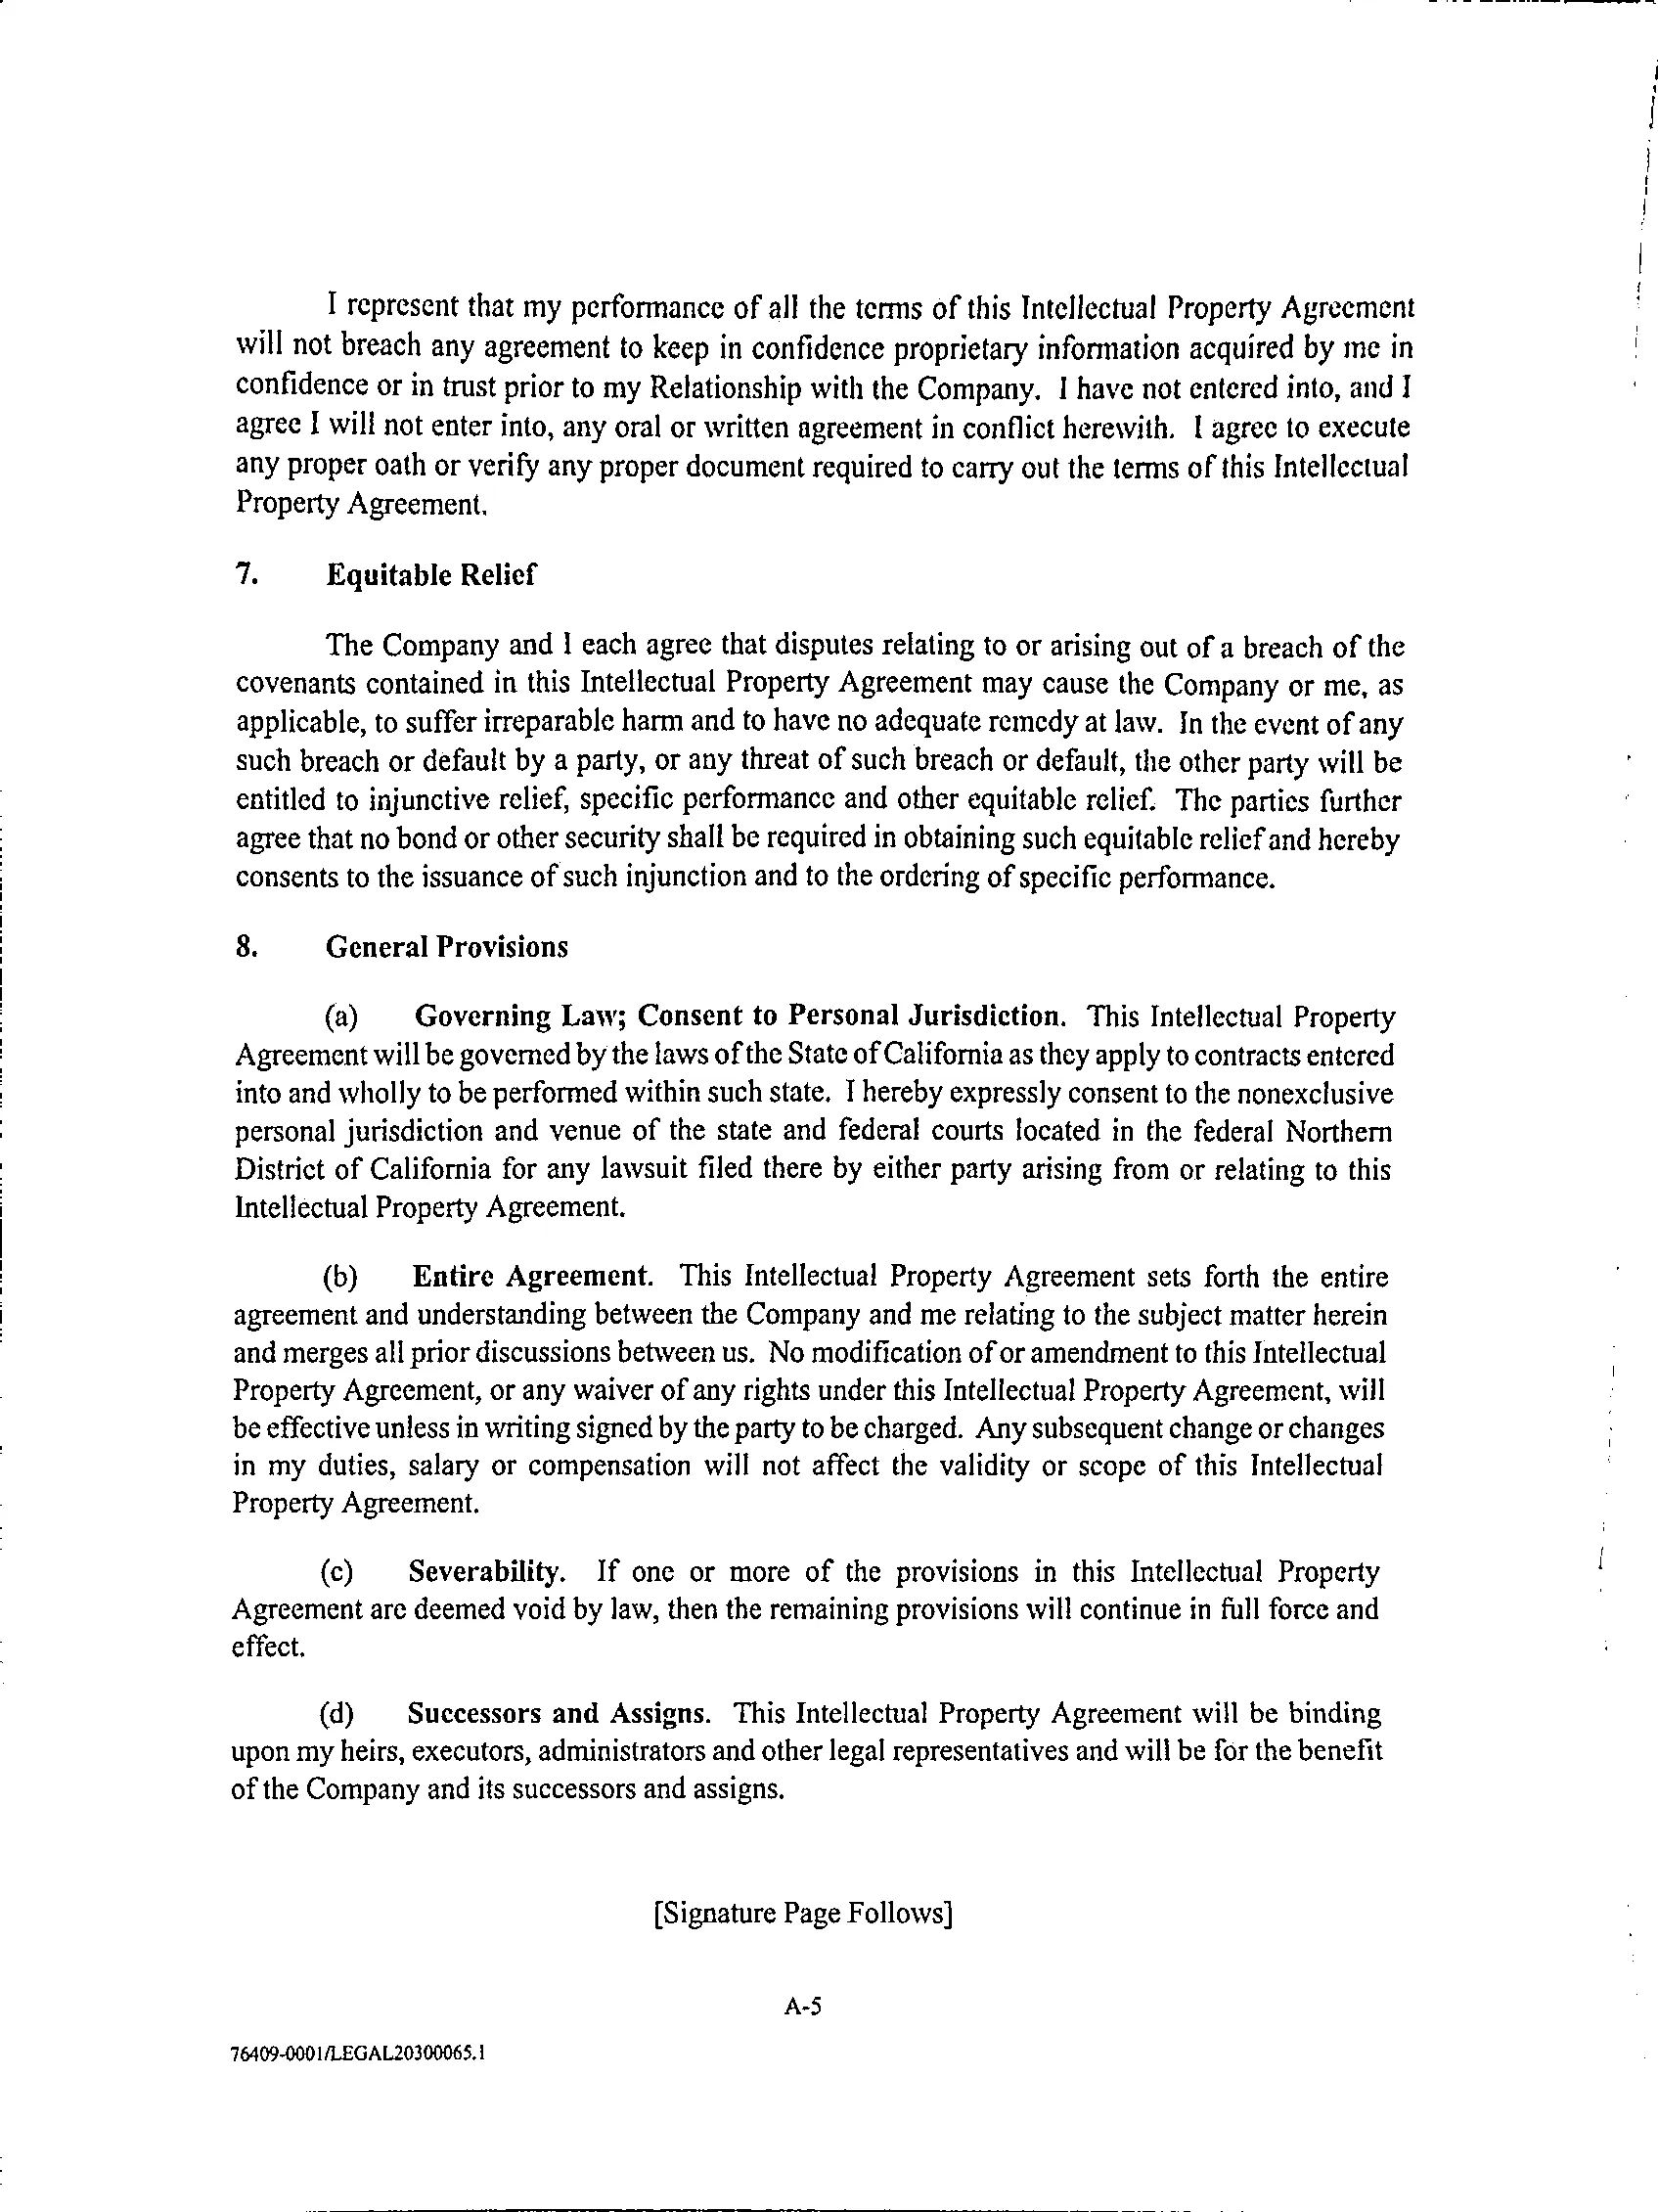
Please refer to the [Digitize Document for Archiving](/docs/guides/digitize-document) guide to learn how to upload and digitize a document. For this guide, we'll assume you have a digitized document with the ID `file_jmjje3ut90btw1r9`.

### Step 2: Extract the Text
Next, you need to extract the text from the digitized document. You can do this by creating an `extract-text` task and setting the `format` parameter to `plain`.
} title="Extract Text">
Creates a task to extract text from a specified image file.
```bash
curl -X POST "https://api.scan-documents.com/v1/image-operations/extract-text" \
-H "x-api-key: YOUR_API_KEY" \
-H "Content-Type: application/json" \
-d '{
"input": "file_jmjje3ut90btw1r9",
"format": "plain"
}'
```
The API will respond with a task object. Once the task is completed, its `result` will contain the extracted text.
```json
{
"id": "task_wsn9ej4f8bmrg7j7",
"operation": "extract-text",
"status": "completed",
"parameters": {
"input": "file_jmjje3ut90btw1r9",
"format": "plain"
},
"result": {
"format": "plain",
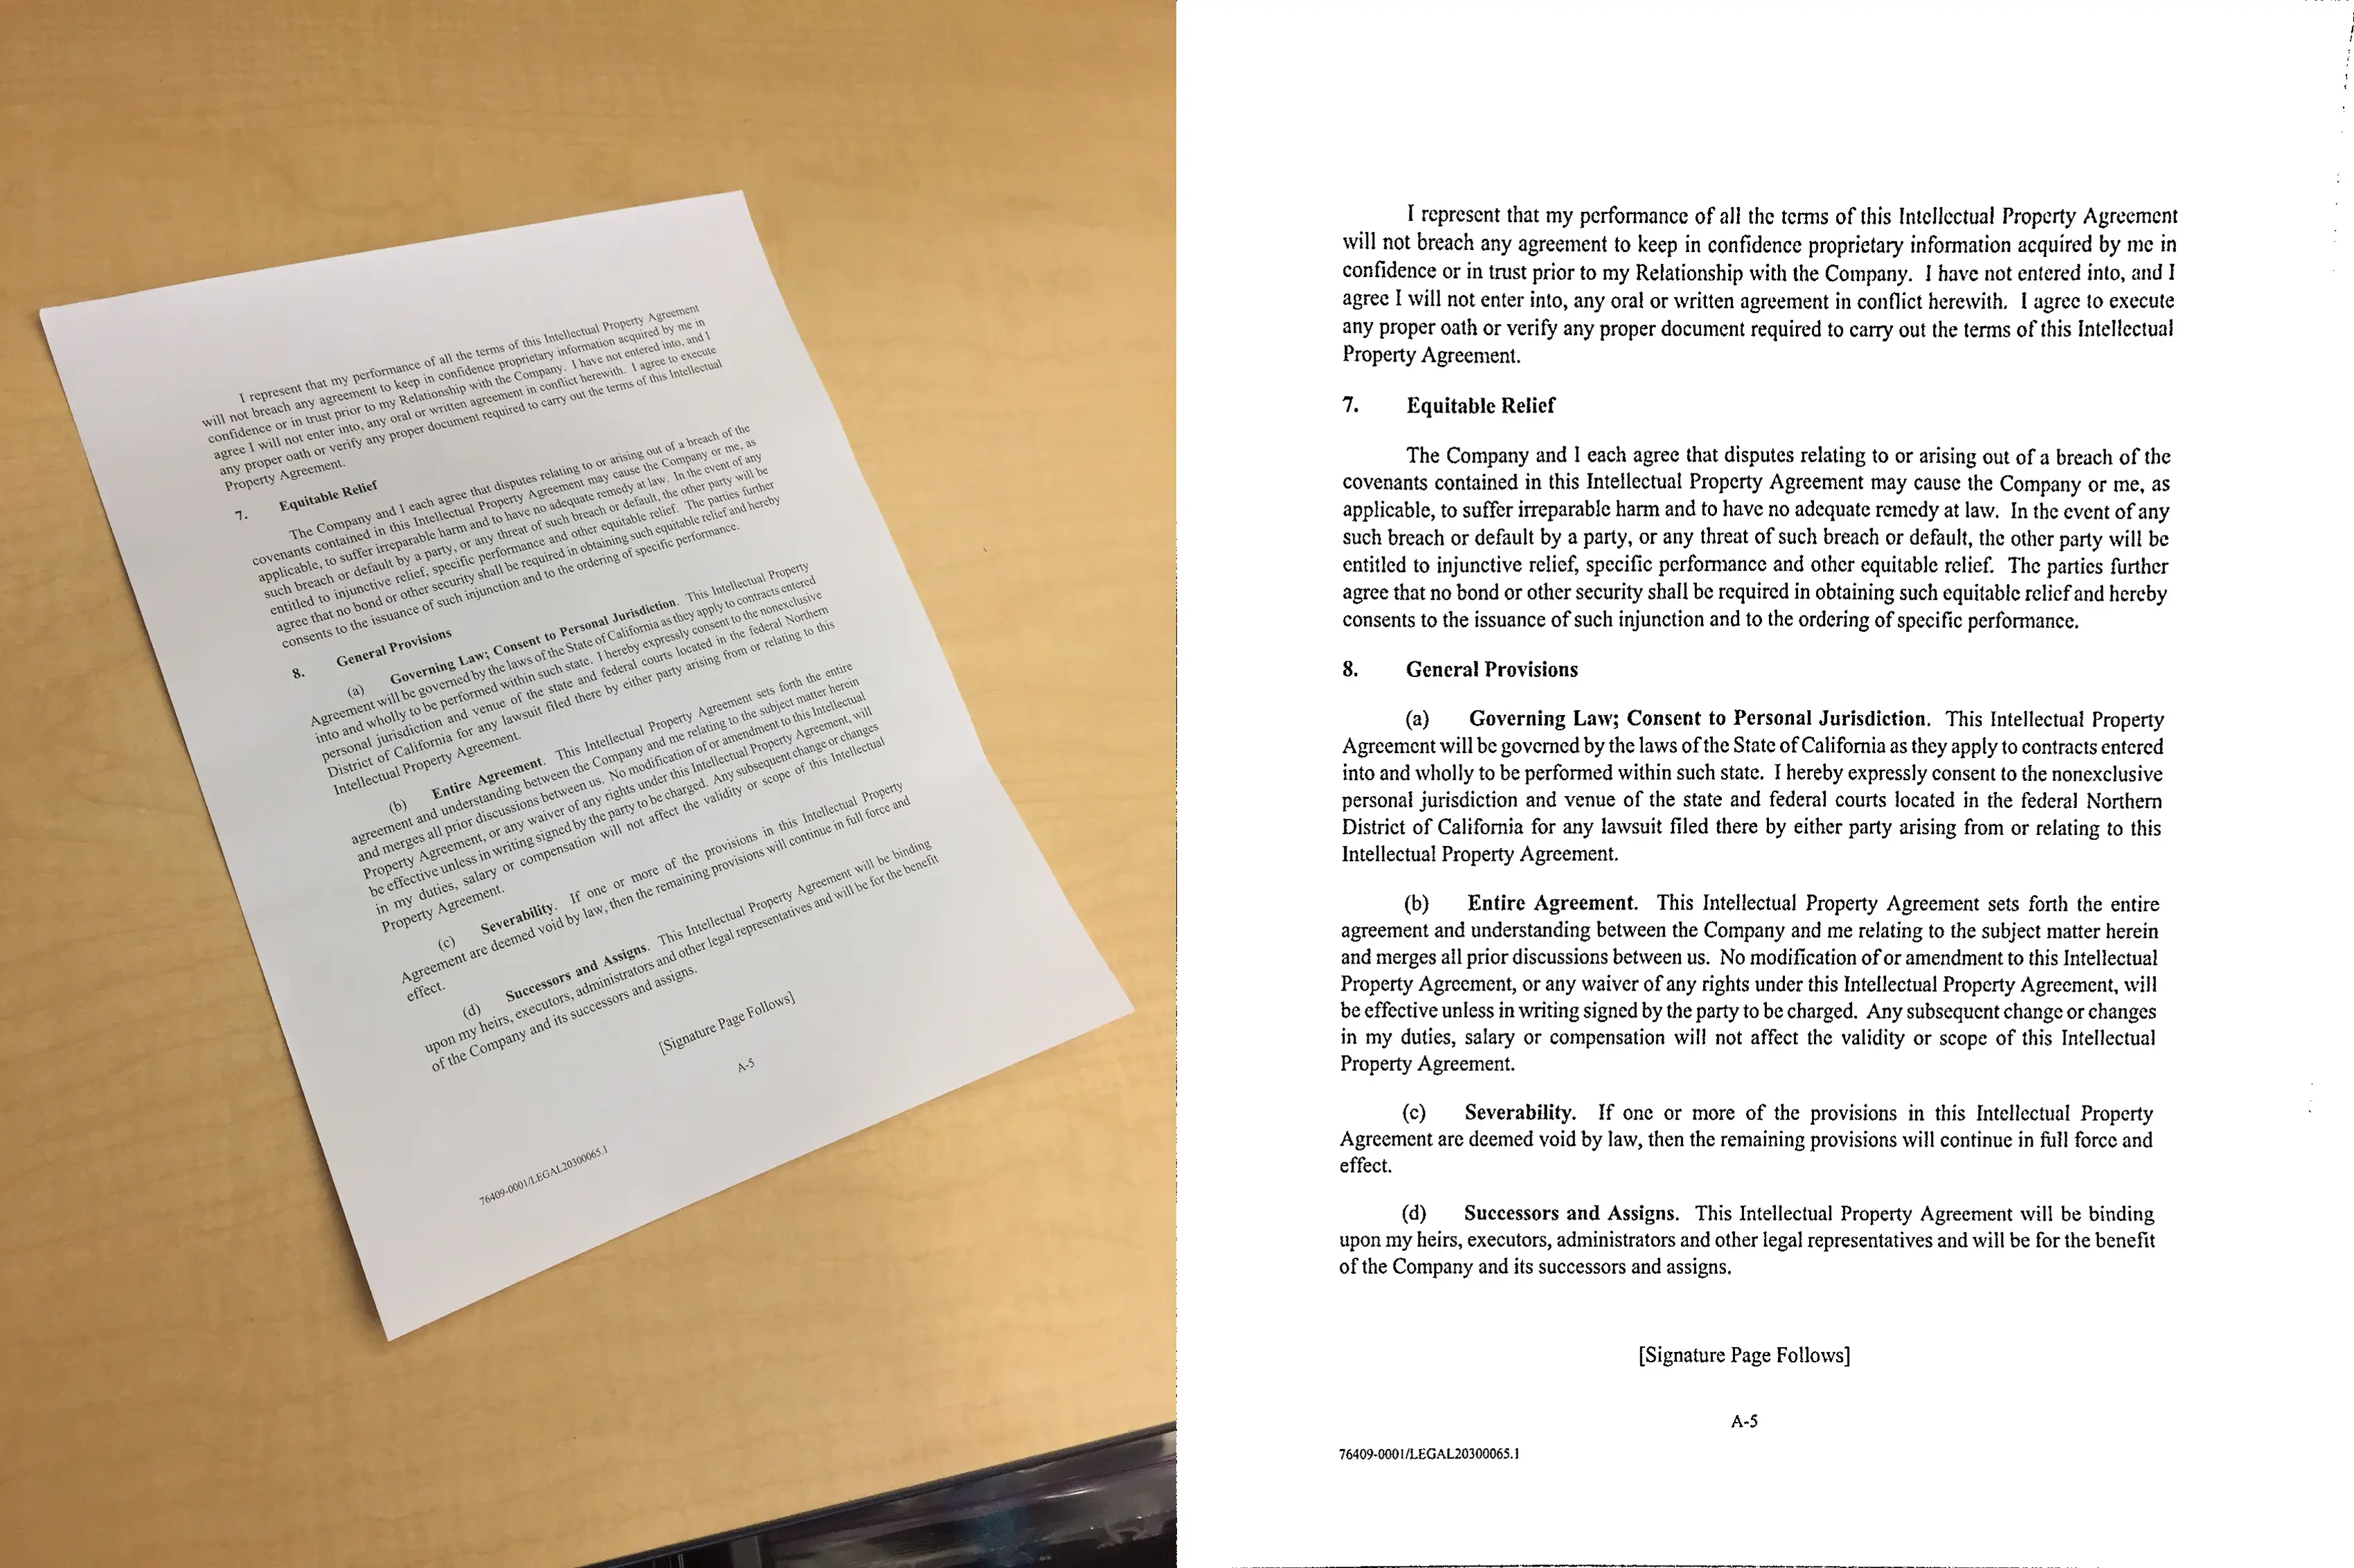
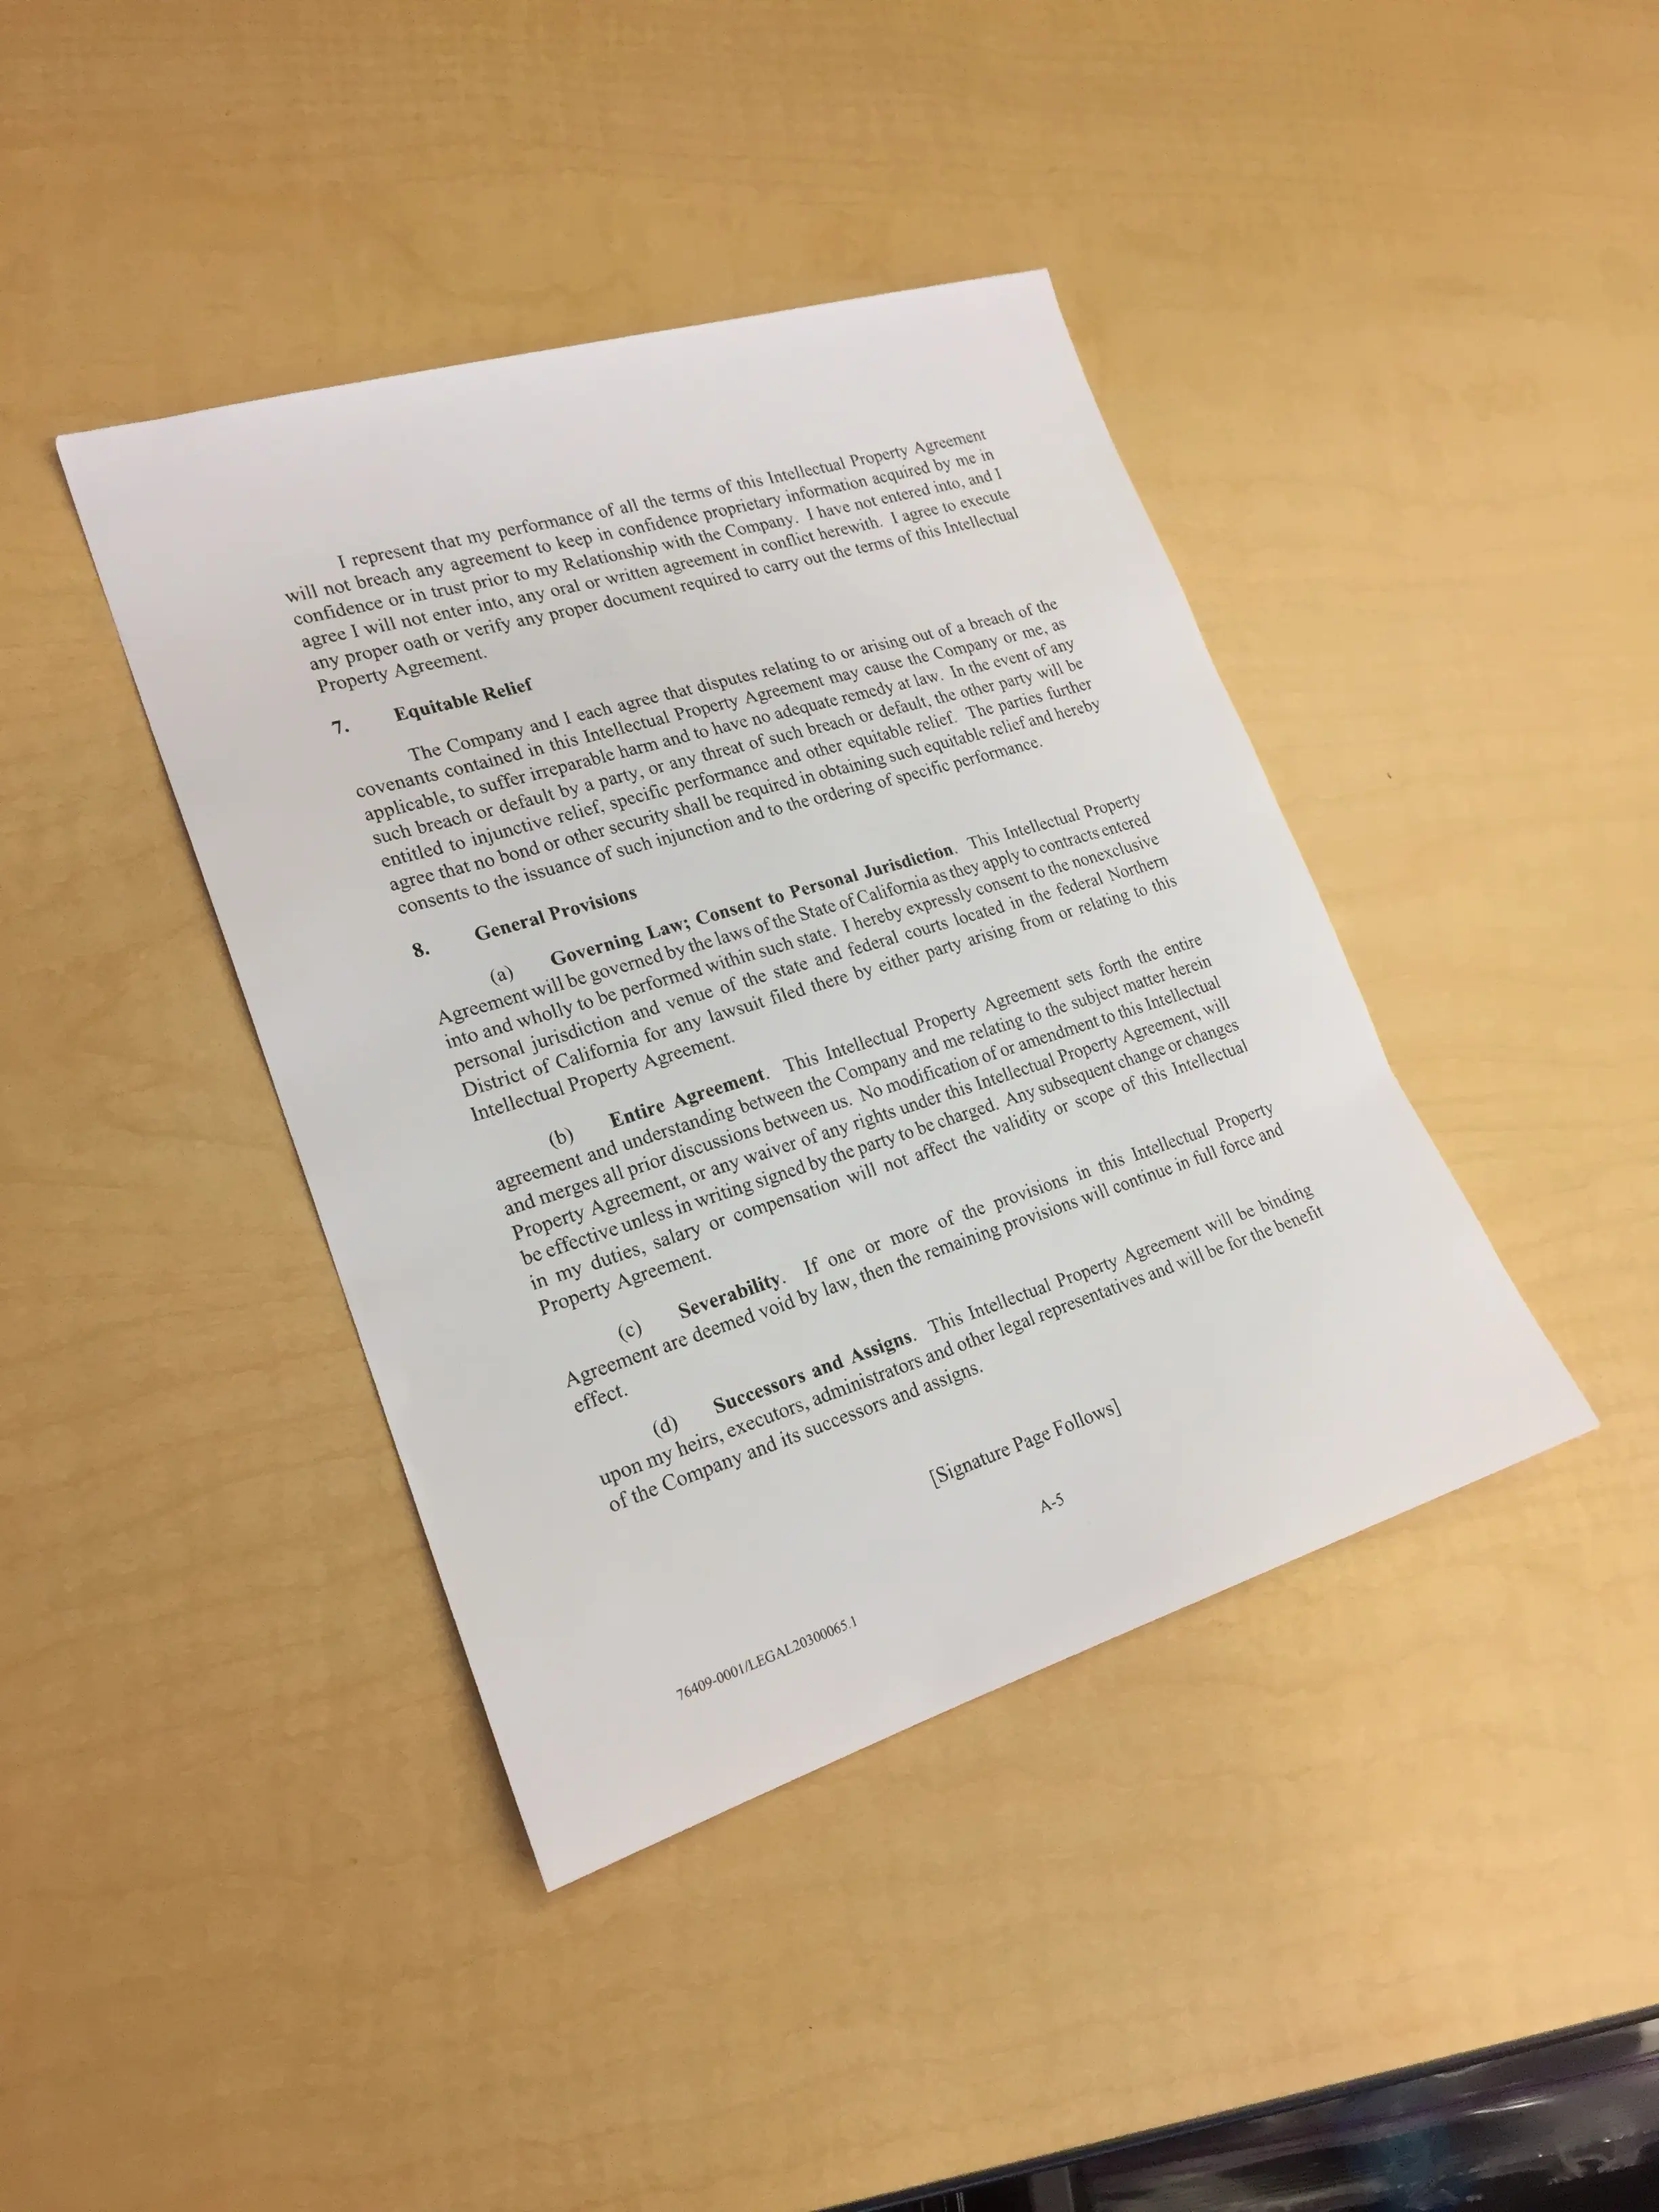
"content": "I represent that my performance of all the terms of this Intellectual Property Agreement\nwill not breach any agreement to keep in confidence proprietary information acquired by me in\nconfidence or in trust prior to my Relationship with the Company. I have not entered into, and I\nagree I will not enter into, any oral or written agreement in conflict herewith. I agree to execute\nany proper oath or verify any proper document required to carry out the terms of this Intellectual\nProperty Agreement.\n7.\nEquitable Relief\nThe Company and I each agree that disputes relating to or arising out of a breach of the\ncovenants contained in this Intellectual Property Agreement may cause the Company or me, as\napplicable, to suffer irreparable harm and to have no adequate remedy at law. In the event of any\nsuch breach or default by a party, or any threat of such breach or default, the other party will be\nentitled to injunctive relief, specific performance and other equitable relief. The parties further\nagree that no bond or other security shall be required in obtaining such equitable relief and hereby\nconsents to the issuance of such injunction and to the ordering of specific performance.\n8.\nGeneral Provisions\n(a) Governing Law; Consent to Personal Jurisdiction. This Intellectual Property\nAgreement will be governed by the laws of the State of California as they apply to contracts entered\ninto and wholly to be performed within such state. I hereby expressly consent to the nonexclusive\npersonal jurisdiction and venue of the state and federal courts located in the federal Northern\nDistrict of California for any lawsuit filed there by either party arising from or relating to this\nIntellectual Property Agreement.\n(b)\nEntire Agreement. This Intellectual Property Agreement sets forth the entire\nagreement and understanding between the Company and me relating to the subject matter herein\nand merges all prior discussions between us. No modification of or amendment to this Intellectual\nProperty Agreement, or any waiver of any rights under this Intellectual Property Agreement, will\nbe effective unless in writing signed by the party to be charged. Any subsequent change or changes\nin my duties, salary or compensation will not affect the validity or scope of this Intellectual\nProperty Agreement.\n(c) Severability. If one or more of the provisions in this Intellectual Property\nAgreement are deemed void by law, then the remaining provisions will continue in full force and\neffect.\n(d) Successors and Assigns. This Intellectual Property Agreement will be binding\nupon my heirs, executors, administrators and other legal representatives and will be for the benefit\nof the Company and its successors and assigns.\n\n[Signature Page Follows]\nA-5\n76409-0001/LEGAL20300065.1"
},
"callback_url": null,
"created_at": "2025-08-23T14:47:28.000Z",
"updated_at": "2025-08-23T14:47:40.000Z"
}
```
### Step 3: Index the Content
Now that you have the text content of the document, you can store it in your preferred search engine or database. For example, if you are using Elasticsearch, you would index the document like this:
```json
{
"file_id": "file_0246813579",
"content": "I represent that my performance..."
}
```
By indexing the content, you can now build a powerful search experience for your users, allowing them to quickly find the information they need from a large collection of documents.
# Introduction
URL: /docs/guides
Scan Documents API Guides
***
title: Introduction
description: Scan Documents API Guides
icon: BookOpen
--------------

This is the Guide Section for the Scan Documents API. Here you will find tutorials, how-to guides, and other resources to help you get started with the API.
## How-to Guides
The How-To guides contain practical, step-by-step instructions to help you quickly complete specific tasks using Scan Documents API.
### Document Digitization
Guides on how to automate the digitization of documents using the Scan Documents API.
} title="Digitize Document for Archiving">
Learn how to digitize a physical document for digital archiving and search.
} title="Extract and Search Document Content">
Learn how to extract text from a document and make it searchable.
### Business Automation
Guides on how to solve common business problems using the Scan Documents API.
} title="Automated Expense Reporting">
Learn how to automate expense reporting by extracting structured data from receipts.
} title="Invoice Processing">
Automate invoice processing by extracting structured data from PDF documents.
### File Manipulation
Guides on how to manipulate files using the Scan Documents API.
} title="Convert Images to PDF">
Learn how to convert multiple images into a single PDF file.
} title="Split a PDF">
Learn how to split a large PDF into smaller, individual files.
} title="Merge PDFs">
Learn how to merge multiple PDF files into a single document.
# Invoice Processing
URL: /docs/guides/invoice-processing
Automate invoice processing by extracting structured data from PDF documents.
***
title: Invoice Processing
description: Automate invoice processing by extracting structured data from PDF documents.
icon: FileText
--------------
At this time, extracting structured data only works for images. So, this guide assumes you PDF invoice has a single page. If your invoice has multiple pages, you must run the extract-text operation on each page separately.
Automating invoice processing can significantly reduce manual data entry, prevent errors, and speed up your accounts payable workflow. With the Scan Documents API, you can extract structured data from your invoices, making it easy to integrate with your accounting system.
This guide will demonstrate how to build an automated invoice processing solution using the Scan Documents API.
} title="See in Postman">
This guide's API calls are available as a Postman collection. You can use it to quickly test the API and see how it works.
## Business Problem
Your company receives hundreds of invoices in PDF format every month. Manually extracting information like the invoice number, due date, line items, and total amount is a tedious and error-prone process. You need a way to automate this data extraction to improve efficiency and accuracy.
## Solution
The Scan Documents API can help you solve this problem by extracting structured data from your PDF invoices. Here's how:
### Step 1: Upload the Invoice PDF
First, you'll upload the invoice PDF to the API.
} title="Upload a File">
Creates a new file
```bash
curl -X POST "https://api.scan-documents.com/v1/files" \
-H "x-api-key: YOUR_API_KEY" \
-F name="Invoice" \
-F file="@/path/to/your/invoice.pdf"
```
The API will respond with a file object for each uploaded image. Take note of the file IDs from each response, as you'll need them for the next step.
```json
{
"id": "file_hvx41hshvvy1shop",
"name": "Invoice",
"type": "application/pdf",
"properties": {
"size": 29537,
"page_count": 1
},
"task_id": null,
"created_at": "2025-08-23T15:46:37.000Z"
}
```
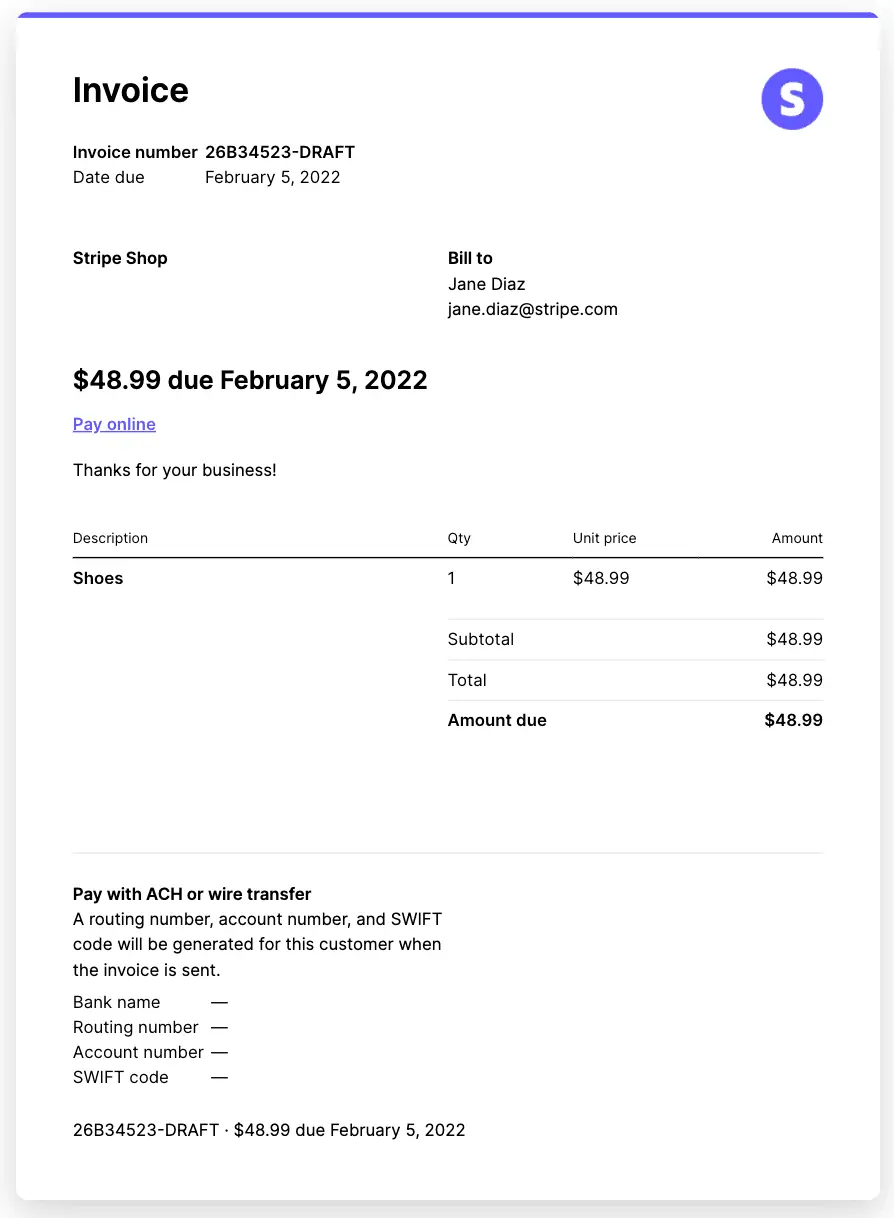
} title="Download Sample Invoice PDF">
You can use this sample invoice PDF to follow along with the guide.
### Step 2: Convert PDF to Image
Next, convert the PDF to an image format that the `extract-text` operation can process. We'll convert it to a high-resolution PNG image.
} title="Render PDF to Image">
Creates a task to render a PDF file into one or more image files.
```bash
curl -X POST "https://api.scan-documents.com/v1/pdf-operations/render"
-H "x-api-key: YOUR_API_KEY" \
-H "Content-Type: application/json" \
-d '{
"input": "file_ajw8fgkjlmzxrzz3"
}'
```
The API will respond with a task object. Once the task is completed, its `result` will contain the ID of the rendered image file.
```json
{
"id": "task_xmcg7g55pu45myau",
"operation": "render",
"status": "completed",
"parameters": {
"input": "file_hvx41hshvvy1shop",
"dpi": 300
},
"result": {
"generated_files": [
{
"id": "file_d2l001p7fw1yhcb7",
"name": "Receipt - 1",
"type": "image/png",
"properties": {
"size": 588331,
"width": 2380,
"height": 3368
},
"task_id": "task_xmcg7g55pu45myau",
"created_at": "2025-08-23T15:48:20.000Z"
}
]
},
"callback_url": null,
"created_at": "2025-08-23T15:48:13.000Z",
"updated_at": "2025-08-23T15:48:21.000Z"
}
```
### Step 3: Extract Structured Data
Now, we'll use the `extract-text` operation with a JSON schema to extract the invoice number, due date, line items, and total amount.
Here's the JSON schema we'll use:
```json
{
"type": "object",
"properties": {
"invoice_number": {
"type": "string",
"description": "The invoice number."
},
"due_date": {
"type": "string",
"description": "The due date of the invoice in YYYY-MM-DD format."
},
"line_items": {
"type": "array",
"items": {
"type": "object",
"properties": {
"description": {
"type": "string",
"description": "The description of the line item."
},
"quantity": {
"type": "number",
"description": "The quantity of the line item."
},
"unit_price": {
"type": "number",
"description": "The unit price of the line item."
},
"amount": {
"type": "number",
"description": "The total amount for the line item."
}
},
"required": ["description", "quantity", "unit_price", "amount"]
}
},
"total_amount": {
"type": "number",
"description": "The total amount of the invoice."
}
},
"required": ["invoice_number", "due_date", "line_items", "total_amount"]
}
```
Now, let's make the API call:
} title="Extract Text">
Creates a task to extract text from a specified image file.
```bash
curl -X POST "https://api.scan-documents.com/v1/image-operations/extract-text" \
-H "x-api-key: YOUR_API_KEY" \
-H "Content-Type: application/json" \
-d '{
"input": "file_d2l001p7fw1yhcb7",
"format": "json",
"schema": {
"type": "object",
"properties": {
"invoice_number": {
"type": "string",
"description": "The invoice number."
},
"due_date": {
"type": "string",
"description": "The due date of the invoice in YYYY-MM-DD format."
},
"line_items": {
"type": "array",
"items": {
"type": "object",
"properties": {
"description": {
"type": "string",
"description": "The description of the line item."
},
"quantity": {
"type": "number",
"description": "The quantity of the line item."
},
"unit_price": {
"type": "number",
"description": "The unit price of the line item."
},
"amount": {
"type": "number",
"description": "The total amount for the line item."
}
},
"required": ["description", "quantity", "unit_price", "amount"]
}
},
"total_amount": {
"type": "number",
"description": "The total amount of the invoice."
}
},
"required": ["invoice_number", "due_date", "line_items", "total_amount"]
}
}'
```
The result of this task will be a JSON object containing the extracted data:
```json
{
"id": "task_dqnr9ijylyl8ynf3",
"operation": "extract-text",
"status": "completed",
"parameters": {
"input": "file_d2l001p7fw1yhcb7",
"format": "json",
"schema": {
"type": "object",
"properties": {
"invoice_number": {
"type": "string",
"description": "The invoice number."
},
"due_date": {
"type": "string",
"description": "The due date of the invoice in YYYY-MM-DD format."
},
"line_items": {
"type": "array",
"items": {
"type": "object",
"properties": {
"description": {
"type": "string",
"description": "The description of the line item."
},
"quantity": {
"type": "number",
"description": "The quantity of the line item."
},
"unit_price": {
"type": "number",
"description": "The unit price of the line item."
},
"amount": {
"type": "number",
"description": "The total amount for the line item."
}
},
"required": [
"description",
"quantity",
"unit_price",
"amount"
]
}
},
"total_amount": {
"type": "number",
"description": "The total amount of the invoice."
}
},
"required": [
"invoice_number",
"due_date",
"line_items",
"total_amount"
]
}
},
"result": {
"format": "json",
"content": "{\n \"invoice_number\": \"26B34523-DRAFT\",\n \"due_date\": \"2022-02-05\",\n \"line_items\": [\n {\n \"description\": \"Shoes\",\n \"quantity\": 1,\n \"unit_price\": 48.99,\n \"amount\": 48.99\n }\n ],\n \"total_amount\": 48.99\n}"
},
"callback_url": null,
"created_at": "2025-08-23T15:54:36.000Z",
"updated_at": "2025-08-23T15:54:46.000Z"
}
```
The parsed content will look like this:
```json
{
"invoice_number": "26B34523-DRAFT",
"due_date": "2022-02-05",
"line_items": [
{
"description": "Shoes",
"quantity": 1,
"unit_price": 48.99,
"amount": 48.99
}
],
"total_amount": 48.99
}
```
With the structured data extracted, you can now easily integrate it into your accounting system, ERP, or any other application, streamlining your entire accounts payable process.
# Merge PDFs
URL: /docs/guides/merge-pdfs
Learn how to merge multiple PDF files into a single document.
***
title: Merge PDFs
description: Learn how to merge multiple PDF files into a single document.
icon: Combine
-------------
Combining multiple PDF files into a single document is a common requirement in many business processes. The Scan Documents API provides a simple way to merge multiple PDFs into one.
## Business Problem
Imagine you are a sales representative preparing a proposal for a client. You have several documents in PDF format: a cover letter, a project proposal, a pricing sheet, and a master services agreement. You want to combine all of these documents into a single, professional-looking PDF to send to the client.
## Solution
We can solve this problem byusing the `merge` operation in the Scan Documents API. Here’s how:
1. **Upload the PDFs:** First, you'll upload all the individual PDF files to the API.
2. **Merge the PDFs:** Then, you'll use the `merge` operation to combine the uploaded PDFs into a single file.
Let's get started!
### Step 1: Upload the PDFs
First, you need to upload each PDF file to the Scan Documents API.
} title="Upload a File">
Creates a new file
```bash
# Upload the cover letter
curl -X POST "https://api.scan-documents.com/v1/files" \
-H "x-api-key: YOUR_API_KEY" \
-F name="Cover Letter" \
-F file="@/path/to/your/cover-letter.pdf"
```
The API will respond with a file object. Here is an example:
```json
{
"id": "file_euyrvozb9302uwhq",
"name": "Cover Letter",
"type": "application/pdf",
"properties": {
"size": 120000,
"page_count": 1
},
"task_id": null,
"created_at": "2025-08-20T10:20:00.000Z"
}
```
You'll need to upload all other documents similarly.
Take note of the file IDs from each response, as you'll need them for the next step.
### Step 2: Merge the PDFs
Now that you have uploaded all your PDFs, you can use the `merge` operation to combine them into a single file. You will need to provide the file IDs of the PDFs in the order you want them to appear in the final document.
} title="Merge PDFs">
Creates a task to merge multiple PDF files into a single document.
```bash
curl -X POST "https://api.scan-documents.com/v1/pdf-operations/merge" \
-H "x-api-key: YOUR_API_KEY" \
-H "Content-Type: application/json" \
-d '{
"name": "Client Proposal.pdf",
"input": [
"file_euyrvozb9302uwhq",
"file_euyrvozb9302uwhr",
"file_euyrvozb9302uwhs",
"file_euyrvozb9302uwht"
]
}'
```
The result of this task will be a new PDF file containing all the merged documents.
```json
{
"id": "task_euyrvozb9302uwhu",
"operation": "merge",
"status": "completed",
"parameters": {
"name": "Client Proposal.pdf",
"input": [
"file_euyrvozb9302uwhq",
"file_euyrvozb9302uwhr",
"file_euyrvozb9302uwhs",
"file_euyrvozb9302uwht"
]
},
"result": {
"generated_files": [
{
"id": "file_euyrvozb9302uwhv",
"name": "Client Proposal.pdf",
"type": "application/pdf",
"properties": {
"size": 1536000,
"page_count": 10
},
"task_id": "task_euyrvozb9302uwhu",
"created_at": "2025-08-20T10:25:00.000Z"
}
]
},
"callback_url": null,
"created_at": "2025-08-20T10:24:00.000Z",
"updated_at": "2025-08-20T10:25:00.000Z"
}
```
You can now download the final, merged PDF using the `/v1/files/{id}/download` endpoint. This single, organized document is now ready to be sent to your client.
# Quickstart
URL: /docs/guides/quickstart
Quickstart guide for using the API
***
title: Quickstart
description: Quickstart guide for using the API
icon: Rocket
------------
Scan Documents API is organized around REST and some ASYNC API principles. The API has predictable resource-oriented URLs, accepts JSON-encoded request bodies (except for file uploads), returns JSON-encoded responses, and uses standard HTTP response codes and methods.
Now let’s see how to get start with Scan Documents API.
The first step is creating an account.
} external={true} href={'https://dashboard.scan-documents.com'}>
Scan your images and create readable PDFs with them
As soon as you sign up for the [Scan Documents Dashboard](https://dashboard.scan-documents.com), you will be able to generate an API Key.
Under the free plan, you will be able to execute up to 25 free requests. Then, you will
need to upgrade your account to a paid plan to continue using the API.
## Using Your API Key
To authenticate your requests to the Scan Documents API, you need to include your API key in the `x-api-key` header of your request.
Here is an example of how to do this using curl:
```bash
curl -X GET https://api.scan-documents.com/v1/files \
-H "x-api-key: YOUR_API_KEY"
-H "Content-Type: application/json"
```
Request that are not authenticated with a correct API key will receive a 401 Unauthorized response.
For example, let’s create an image!
} title="Upload a File">
Upload and store files securely in the cloud
## Uploading a File
All the files in Scan Documents API, must be created.
To create a file you can upload one from your computer or server using the creation endpoint.
Let’s upload the following image to the API:
First, copy your api key on the dashboard and replace it on the `x-api-key` field, and replace the `file` field with
the path to the image you want to use as a watermark.
```bash
curl -X POST "https://api.scan-documents.com/v1/files" \
-H "x-api-key: api-key" \
-F name="File Name" \
-F file="path-to-file"
```
This will return a file object of type `image/jpeg`.
```json
{
"id": "file_dug40glt2pezznum",
"name": "File Name",
"type": "image/jpeg",
"properties": {
"size": 271272,
"width": 1835,
"height": 2297
},
"task_id": null,
"created_at": "2025-05-09T13:27:54.000Z"
}
```
Let's break down the response:
A unique identifier for the file (e.g., `file_euyrvozb9302uwhq`). You'll use this ID to refer to the file in other API operations.
The name you gave the file when you uploaded it (e.g., `Example image`).
The MIME type of the file (e.g., `image/png`, `application/pdf`). This tells you what kind of file it is.
An object containing additional properties specific to the file type. This will include details like size, dimensions, or page count.
The file size in bytes (e.g., `1024`).
The width of the image in pixels (e.g., `800`).
The height of the image in pixels (e.g., `600`).
If this file was generated as the result of an API operation (like converting an image), this field will contain the ID of that task. Otherwise, it will be `null`.
The date and time when the file was uploaded or created, in ISO format (e.g., `2021-05-01T12:00:00Z`).
## Downloading the File
Do you want to check how it was uploaded? Just download the image using the download endpoint putting the ID of
the file to download!
} title="Download a File">
Download a file from the API
Copy the file ID from the previous response and replace it along with the API key in the following command:
```bash
curl -X GET "https://api.scan-documents.com/v1/files/file_dug40glt2pezznum/download" \
-H "x-api-key: api-key" \
-o "File Name.jpeg"
```
This will download the file to your computer with the name `File Name.jpeg`.
## The Next Steps
Here is everything you need to start. The next step is learning about the operations you can perform on the file you just uploaded.
Here are some of the things you can do:
} title="Digitize Document">
Upload an image of a document, detect it, warp it, and enhance its colors.
} title="Extract text from Document">
Extract text from a document and parse it into markdown format.
# Split a PDF
URL: /docs/guides/split-pdf
Learn how to split a large PDF into smaller, individual files.
***
title: Split a PDF
description: Learn how to split a large PDF into smaller, individual files.
icon: Scissors
--------------
Large PDF files can be difficult to manage and share. The Scan Documents API allows you to easily split a single PDF into multiple, smaller PDF files, making them easier to handle.
## Business Problem
Imagine you work for an insurance company. You receive a single, large PDF file that contains multiple insurance claims. To process these claims efficiently, you need to split this large PDF into individual files, with each file representing a single claim.
## Solution
We can solve this problem by using the `split` operation in the Scan Documents API. Here’s how:
### Step 1: Upload the PDF
First, you need to upload the large PDF file to the Scan Documents API.
} title="Upload a File">
Creates a new file
```bash
curl -X POST "https://api.scan-documents.com/v1/files" \
-H "x-api-key: YOUR_API_KEY" \
-F name="All Claims" \
-F file="@/path/to/your/claims.pdf"
```
The API will respond with a file object for the uploaded PDF. Take note of the file ID from the response, as you'll need it in the next step.
```json
{
"id": "file_euyrvozb9302uwhq",
"name": "All Claims",
"type": "application/pdf",
"properties": {
"size": 1024000,
"page_count": 6
},
"task_id": null,
"created_at": "2025-08-20T10:10:00.000Z"
}
```
### Step 2: Split the PDF
Now that you have uploaded the PDF, you can use the `split` operation to divide it into smaller files. This operation will split each page of the PDF into a separate, single-page PDF file.
} title="Split PDF">
Creates a task to split a PDF file into multiple single-page PDF files.
```bash
curl -X POST "https://api.scan-documents.com/v1/pdf-operations/split" \
-H "x-api-key: YOUR_API_KEY" \
-H "Content-Type: application/json" \
-d '{ "input": "file_euyrvozb9302uwhq" }'
```
The result of this task will be a new PDF file for each page of the original document.
```json
{
"id": "task_euyrvozb9302uwhr",
"operation": "split",
"status": "completed",
"parameters": {
"input": "file_euyrvozb9302uwhq"
},
"result": {
"generated_files": [
{
"id": "file_euyrvozb9302uwhs",
"name": "claims_1.pdf",
"type": "application/pdf",
"properties": {
"size": 102400,
"page_count": 1
},
"task_id": "task_euyrvozb9302uwhr",
"created_at": "2025-08-20T10:15:00.000Z"
},
{
"id": "file_euyrvozb9302uwht",
"name": "claims_2.pdf",
"type": "application/pdf",
"properties": {
"size": 102400,
"page_count": 1
},
"task_id": "task_euyrvozb9302uwhr",
"created_at": "2025-08-20T10:15:00.000Z"
}
]
},
"callback_url": null,
"created_at": "2025-08-20T10:14:00.000Z",
"updated_at": "2025-08-20T10:15:00.000Z"
}
```
You can now download each individual page as a separate PDF file using the `/v1/files/{id}/download` endpoint. This makes it much easier to process and manage each page separately.
# Introduction
URL: /docs/integrations
Integrate No-Code tools with Scan Documents
***
title: Introduction
description: Integrate No-Code tools with Scan Documents
icon: House
-----------

This is the Integrations section for the Scan Documents API. Here you will find how to use the API with No-Code tools,
like Zapier, n8n, and Make.
## Integrations
Select the integration you want to use from the list below.
} title="Zapier">
Integrate Scan Documents with Zapier to automate document digitization workflows.
# Events
URL: /docs/events
Learn about the events in the API.
***
title: Events
description: Learn about the events in the API.
icon: GitPullRequestArrow
-------------------------
## Overview
When an event happens, Scan Documents creates a new **Event object**. This event
triggers a webhook notification if user has registered a webhook endpoint and subscribed to the event type.
This is an example of an event object for a `file.deleted` event:
```json
{
"data": {
"id": "file_y9f6oitmeoncvcou",
"name": "file-example",
"type": "image/png"
},
"id": "event_wal69rzpapqrm7yj",
"timestamp": "2025-04-12T15:55:19.000Z",
"type": "file.deleted"
}
```
## Properties
The event object contains the following fields:
A unique identifier for the event (e.g., `event_euyrvozb9302uwhq`). You can use this ID for reconciliation processes.
The type of event that occurred (e.g., `file.deleted`).
The time when the event occurred, in ISO 8601 format (e.g., `2025-04-12T15:55:19.000Z`).
The data associated with the event. The structure of this object depends on the event type.
## Event Types
At the moment, there are two main resources that can trigger events: **files** and **tasks**. Each resource has its own set of events.
### File Events
Events related to file operations. The following events are available:
} title="file.created">
Event triggered when a new file is created.
} title="file.deleted">
Event triggered when a file is deleted.
### Task Events
Events related to task operations. The following events are available:
} title="task.created">
Event triggered when a new task is created.
} title="task.deleted">
Event triggered when a task is deleted.
} title="task.failed">
Event triggered when a task fails.
} title="task.completed">
Event triggered when a task is completed.
## Webhook Notifications
When an event occurs, Scan Documents sends a webhook notification to the registered endpoint. The notification contains the event object in the request body.
Learn more about [webhooks](/docs/webhooks) and how to set them up.
# Files
URL: /docs/files
Learn about how Scan Documents handles file objects
***
title: Files
description: Learn about how Scan Documents handles file objects
icon: FileText
--------------
## Overview
The File object represents a file that has been uploaded to the Scan Documents API.
This could be an image (like a PNG, JPEG, or WebP) or a document (currently, only PDF is supported).
Scan Documents API allows you to operate on these files, through [Task Operations](/docs/tasks). Depending on the type of file,
you can perform various operations such as converting, extracting text, or analyzing the content.
## Example File Object
Here's what a typical File object representing a PNG image might look like:
```json
{
"id": "file_euyrvozb9302uwhq",
"name": "Example image",
"type": "image/png",
"properties": {
"size": 1024,
"width": 800,
"height": 600
},
"task_id": null,
"created_at": "2021-05-01T12:00:00Z"
}
```
Now, let's break down the properties of this File object.
## Properties
Every File object, regardless of its type, will have the following basic information:
A unique identifier for the file (e.g., `file_euyrvozb9302uwhq`). You'll use this ID to refer to the file in other API operations.
The name you gave the file when you uploaded it (e.g., `Example image`).
The MIME type of the file (e.g., `image/png`, `application/pdf`). This tells you what kind of file it is.
An object containing additional properties specific to the file type. This will include details like size, dimensions, or page count.
If this file was generated as the result of an API operation (like converting an image), this field will contain the ID of that task. Otherwise, it will be `null`.
The date and time when the file was uploaded or created, in ISO format (e.g., `2021-05-01T12:00:00Z`).
The `properties` object will vary depending on the type of file. Below are the details for each supported file type.
### Image Files
If the file is an image, the `type` will be one of `image/png`, `image/jpeg`, or `image/webp`.
The `properties` object for an image will contain:
The file size in bytes (e.g., `1024`).
The width of the image in pixels (e.g., `800`).
The height of the image in pixels (e.g., `600`).
#### Example
Here's what a typical File object representing a PNG image might look like:
```json
{
"id": "file_euyrvozb9302uwhq",
"name": "Example image",
"type": "image/png",
"properties": {
"size": 1024,
"width": 800,
"height": 600
},
"task_id": null,
"created_at": "2021-05-01T12:00:00Z"
}
```
### Document Files
If the file is a PDF document, the `type` will be `application/pdf`
The `properties` object for a document will contain:
The file size in bytes (e.g., `20480`).
The number of pages in the document (e.g., `10`).
#### Example
Here's what a typical File object representing a PDF document might look like:
```json
{
"id": "file_euyrvozb9302uwhq",
"name": "Example document",
"type": "application/pdf",
"properties": {
"size": 20480,
"page_count": 10
},
"task_id": null,
"created_at": "2021-05-01T12:00:00Z"
}
```
## File Operations
Now that you understand the File object, you can use it in various API operations. Check out the [Task Operations](/docs/tasks) section for more details on how to use files in your API requests.
# Task Operations
URL: /docs/tasks
Learn about the task operations in the API.
***
title: Task Operations
description: Learn about the task operations in the API.
icon: Cpu
---------
## Overview
Task Operations represent asynchronous jobs that you can initiate through the Scan Documents API to process or transform a [File](/docs/files).
When you request an operation (like extracting text from an image or merging PDF documents), the API creates a
Task object to track its progress. You can then query the status of this task using its unique ID.
## Example Task Object
Here's what a typical File object representing a PNG image might look like:
```json
{
"id": "task_euyrvozb9302uwhq",
"operation": "extract-text",
"status": "completed",
"parameters": {
"input": "file_abc123xyz",
"format": "markdown"
},
"result": {
"format": "markdown",
"content": "**This** is the *extracted* text content"
},
"callback_url": "https://example.com/webhook",
"created_at": "2021-05-03T10:00:00Z",
"updated_at": "2021-05-03T10:05:00Z"
}
```
Now, let's break down the properties of this Task object.
## Properties
Every Task object shares a common structure, regardless of the specific operation being performed:
A unique identifier for the task (e.g., `task_euyrvozb9302uwhq`). You use this ID to check the task's status.
A string indicating the type of operation requested (e.g., `extract-text`, `convert`, `merge`).
The current state of the task. See [Task Statuses](#task-statuses) below.
An object containing the specific inputs you provided when creating the task (e.g., the input file ID, target format, quality settings). The structure varies depending on the `operation`.
An object containing the outcome of the task. Its structure depends on the `status` and `operation`.
* If `status` is `pending` or `processing`, this object is usually empty.
* If `status` is `completed`, this object contains the successful output (e.g., extracted text content, list of generated file IDs).
* If `status` is `failed`, this object contains error details (`error` message and `details`).
An optional URL where the API will send a webhook notification when the task is completed. If not provided, you must manually check the task status OR
use the [webhooks](/docs/webhooks) to listen for task completion events.
This is useful for integrating task completion notifications into your application without polling the API. However,
for API users is recommended to use the [webhooks](/docs/webhooks) for better performance and reliability.
The date and time when the task was created, in ISO format (e.g., `2021-05-03T10:00:00Z`).
The date and time when the task's status was last updated, in ISO format (e.g., `2021-05-03T10:05:00Z`).
## Task Statuses
A task can be in one of the following states:
* `pending`: The task has been accepted but has not yet started processing.
* `processing`: The task is currently being executed.
* `completed`: The task finished successfully. The `result` object contains the output.
* `failed`: The task could not be completed due to an error. The `result` object contains details about the failure.
## Available Operations
Tasks are initiated by making POST requests to specific endpoints under `/v1/image-operations/` or `/v1/pdf-operations/`.
### Image Operations
These operations work on image files (`image/png`, `image/jpeg`, `image/webp`).
} title="Convert">
Converts an image file to a different format (PNG, JPEG, WebP).
} title="Detect Documents">
Detects the boundaries of documents within an image.
} title="Extract Text">
Extracts text content from an image using OCR.
} title="Warp">
Applies perspective correction to an image based on four corner points.
} title="Apply Effect">
Applies a predefined visual effect to an image.
### PDF Operations
These operations work on PDF files (`application/pdf`).
} title="Render">
Converts specific pages of a PDF document into image files (PNG).
} title="Split">
Splits a multi-page PDF into multiple single-page PDF files.
} title="Merge">
Combines multiple PDF files into a single PDF document.
} title="Extract Pages">
Creates a new PDF file containing only specified pages from a source PDF.
## Error Handling
If a task encounters an issue, its `status` will change to `failed`. The `result` object will then contain:
A string describing the error.
An object containing additional context or specifics about the error, if available.
Common reasons for failure include providing an invalid file ID, using incorrect parameters (e.g., invalid page range, unsupported format), or internal processing errors.
### Example
Here is an example of a failed task object:
```json
{
"id": "task_euyrvozb9302uwhq",
"operation": "extract-text",
"status": "failed",
"parameters": {
"input": "file_abc123xyz",
"format": "markdown"
},
"result": {
"error": "Source file not found.",
"details": {
"file_id": "file_abc123xyz",
"reason": "The file might have been deleted."
}
},
"created_at": "2021-05-03T10:00:00Z",
"updated_at": "2021-05-03T10:05:00Z"
}
```
## Waiting for Task Completion
Operations are asynchronous, meaning they may take time to complete.
You can check the status of a task by making a `GET` request to the [task's endpoint](/docs/v1/tasks/id/get),
wait for the callback URL to be invoked if you provided one,
or listen for a [webhook notification](/docs/webhooks) for the event `task.completed` to be triggered when the task is completed.
# OpenAPI Spec
URL: /docs/explore/openapi-spec
Reference the OpenAPI spec for the API
***
title: OpenAPI Spec
description: Reference the OpenAPI spec for the API
icon: Code
----------
## Description
The [OpenAPI](https://spec.openapis.org/oas/v3.1.0.html) spec is a standard way to describe RESTful APIs.
It provides a machine-readable format that can be used to generate documentation, client libraries, and server stubs.
The OpenAPI spec is a JSON or YAML file that describes the endpoints, request and response formats, authentication methods, and other details of the API.
## Download
You can download the OpenAPI spec for the Scan Documents API from the link below.
} title="Download">
Download the OpenAPI spec
# Playground
URL: /docs/explore/playground
Testing the API With the Playground
***
title: Playground
description: Testing the API With the Playground
icon: Play
----------
## Overview
Explore the API with the Playground. The Playground is a web-based interface that allows you to interact with the API in real-time. You can test different endpoints, view responses, and experiment with various parameters.
## Getting Started
Each reference page includes a "Playground" section where you can test the API. The Playground is designed to be user-friendly and intuitive, allowing you to quickly understand how to use the API.
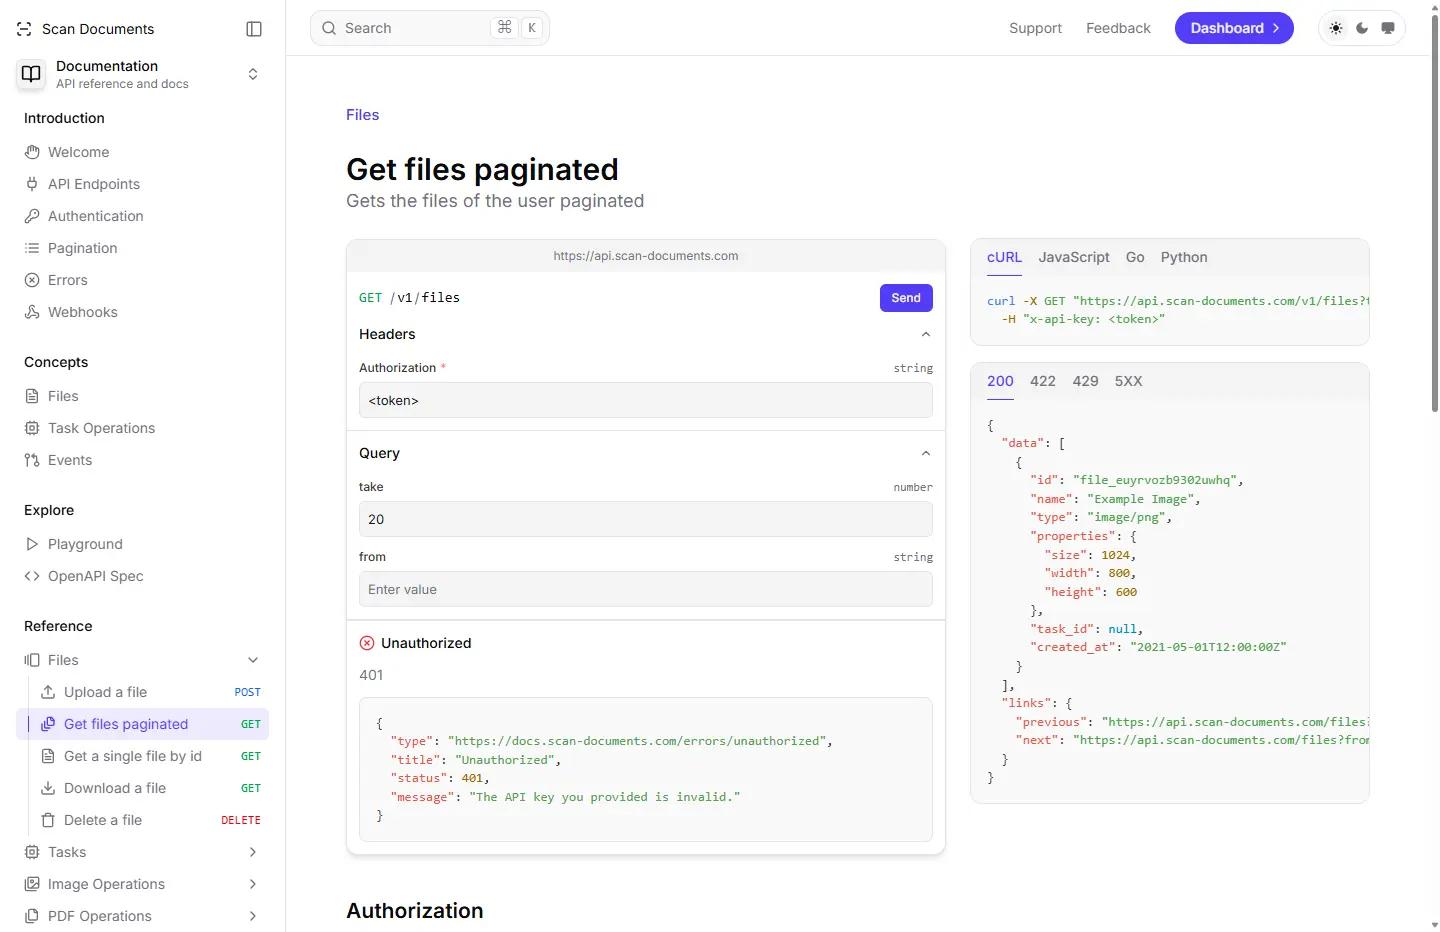
### Setting the API Key
Once you have your API key, you can set it in the Playground at the `Headers` section. This will allow you to authenticate your requests and access the API's features.
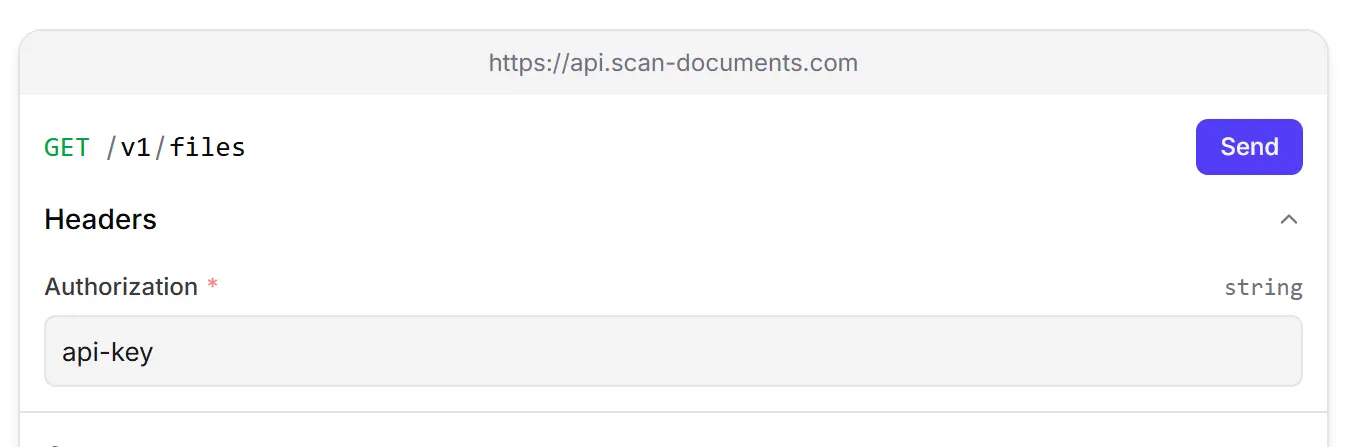
### Adding Parameters
You can add parameters to your requests in the Playground. This allows you to customize your requests and test different scenarios. The Playground provides a user-friendly interface for adding and modifying parameters.
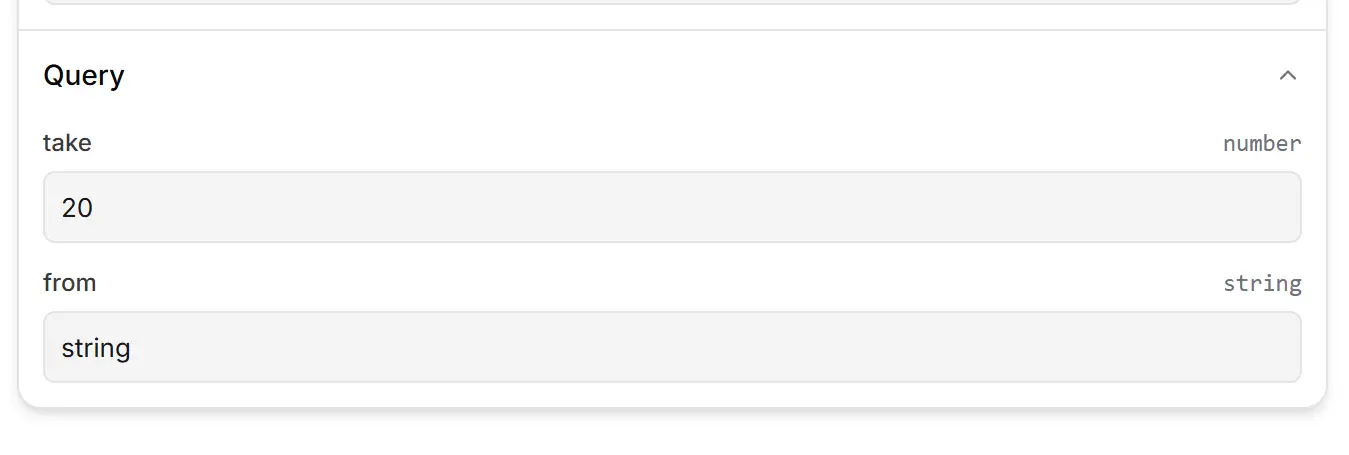
### Response Viewer
After you send a request, the Playground will display the response in a user-friendly format. You can view the response data, headers, and status code. This makes it easy to understand how the API is responding to your requests.
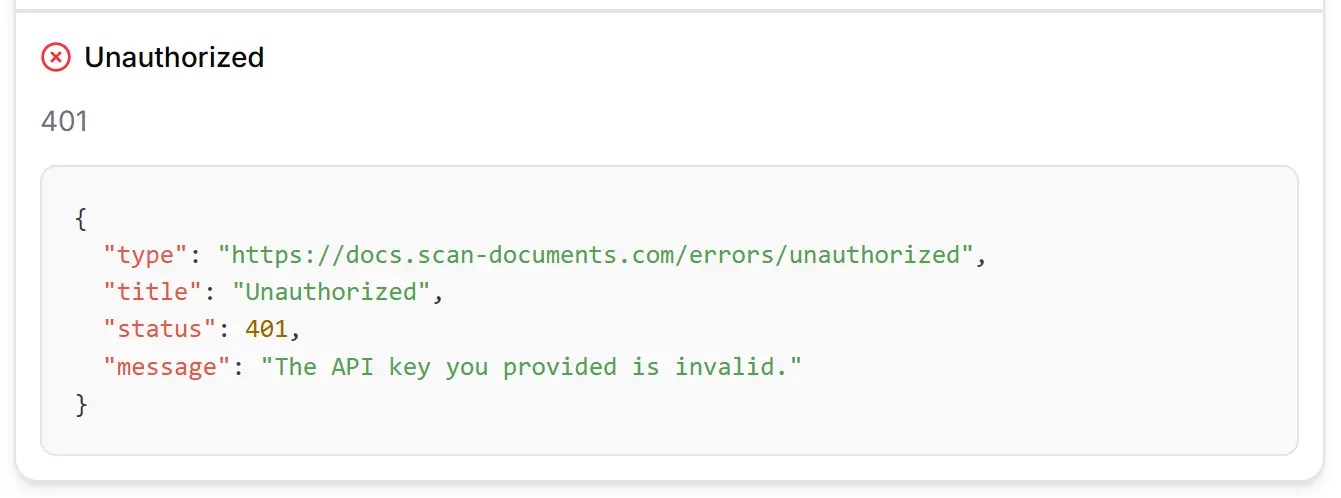
### Request Examples
You can also view request examples in the Playground. This allows you to see how to structure your requests and understand the expected response format. The Playground provides examples for different programming languages, making it easy to integrate the API into your applications.
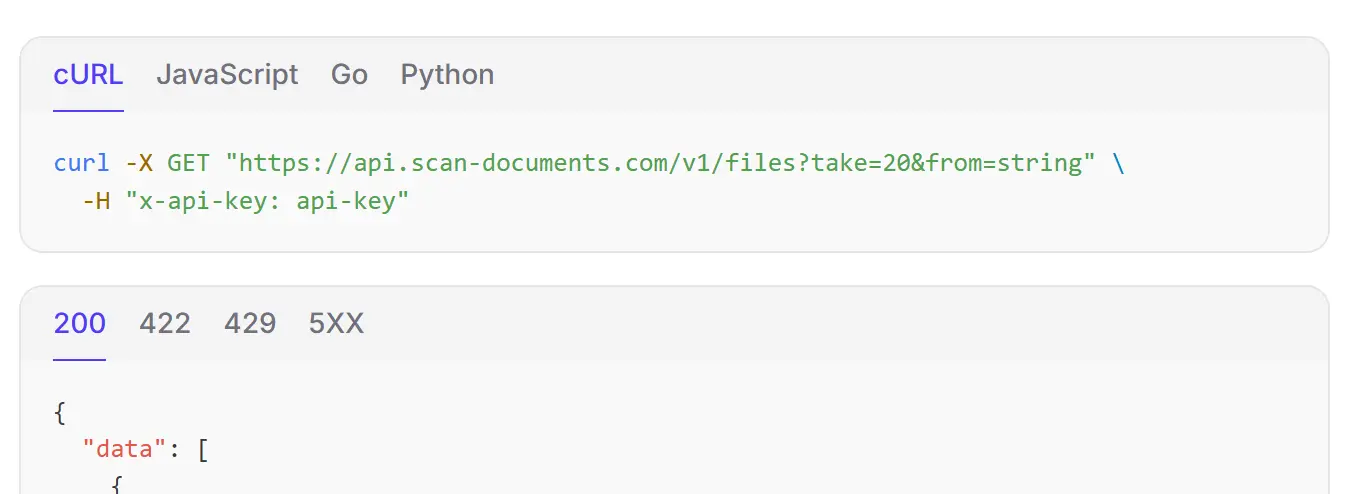
If you have any problem with the playground, use the requests in the `curl` tab. This will give you the exact request that is being sent to the API, which you can then use in your own code or tools.
# Postman Collection
URL: /docs/explore/postman
Test the API with Postman
***
title: Postman Collection
description: Test the API with Postman
icon: Postman
-------------
## Overview
We publish a Postman Collection that you can use to test our API and generate documents with many of our features.
} title="Run in Postman">
You can fork the collection and use it to test the API
## How to use the Postman Collection
1. Click on the **Run in Postman** button above to open the collection in [Postman](https://www.postman.com/downloads/).
2. Fork the collection to your own workspace.
3. Set up the environment variables in Postman:
* `apiKey`: Your API key for authentication.
4. Choose the request you want to test from the collection.
## What's included in the Postman Collection
The Postman Collection at the moment only includes all the endpoints available in the API.
# Authentication
URL: /docs/integrations/zapier/authentication
Learn how to authenticate your requests
***
title: Authentication
description: Learn how to authenticate your requests
icon: KeyRound
--------------
## Getting your API Key
As soon as you sign up for the [Scan Documents Dashboard](https://dashboard.scan-documents.com), you will be able to generate an API Key.
Under the free plan, you will be able to execute up to 25 free requests. Then, you will
need to upgrade your account to a paid plan to continue using the API.
You can create your API key in the API Dashboard by clicking on the "Create API Key" button at the top right corner of
the [API Keys page](https://dashboard.scan-documents.com/api-keys).

Your API Key will be generated and displayed in a modal. Copy it and store it in a safe place!

## Using Your API Key
Connecting an app to Zapier starts with authentication. You can select an app you wish to use in
your Zap, authenticating your account with that app to allow Zapier to access your data.
To authenticate your Zaps to the Scan Documents, you need to add your API Key in the `Account`
section of a Scan Documents Action or Trigger in Zapier.
When setting up your Zap, you will be prompted to enter your API Key. This is where you will enter the API Key you generated earlier.
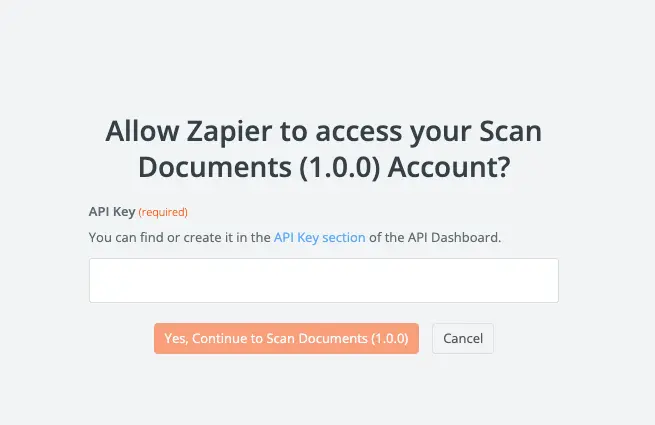
# Introduction
URL: /docs/integrations/zapier
Integrate Zapier with Scan Documents
***
title: Introduction
description: Integrate Zapier with Scan Documents
icon: ListStart
---------------
## Overview
[Zapier](https://zapier.com) is a powerful [no-code automation platform](http://en.wikipedia.org/wiki/No-code_development_platform) that allows you to connect Scan Documents
with 7,000+ of other apps.
With Zapier, you can create workflows that automatically digitize documents, extract text, and perform various actions
based on the content of your documents.
## Getting Started
Right now, Scan Documents integration with Zapier is in private beta. You can request
an invitation by clicking the button below:
} title="Zapier Integration">
Access to the private beta of the Zapier integration
Now you can start creating Zaps that connect Scan Documents with other apps.
# file.created
URL: /docs/file-events/file.created
This event is triggered when a file is created in the system.
***
title: file.created
description: This event is triggered when a file is created in the system.
full: true
icon: Plus
\_openapi:
toc: \[]
structuredData:
headings: \[]
contents: \[]
-------------
{/* This file was generated by Fumadocs. Do not edit this file directly. Any changes should be made by running the generation command again. */}
# file.deleted
URL: /docs/file-events/file.deleted
This event is triggered when a file is deleted from the system.
***
title: file.deleted
description: This event is triggered when a file is deleted from the system.
full: true
icon: Trash
\_openapi:
toc: \[]
structuredData:
headings: \[]
contents: \[]
-------------
{/* This file was generated by Fumadocs. Do not edit this file directly. Any changes should be made by running the generation command again. */}
# task.completed
URL: /docs/tasks-events/task.completed
This event is triggered when a task is completed in the system.
***
title: task.completed
description: This event is triggered when a task is completed in the system.
full: true
icon: Check
\_openapi:
toc: \[]
structuredData:
headings: \[]
contents: \[]
-------------
{/* This file was generated by Fumadocs. Do not edit this file directly. Any changes should be made by running the generation command again. */}
# task.created
URL: /docs/tasks-events/task.created
This event is triggered when a task is created in the system.
***
title: task.created
description: This event is triggered when a task is created in the system.
full: true
icon: Plus
\_openapi:
toc: \[]
structuredData:
headings: \[]
contents: \[]
-------------
{/* This file was generated by Fumadocs. Do not edit this file directly. Any changes should be made by running the generation command again. */}
# task.deleted
URL: /docs/tasks-events/task.deleted
This event is triggered when a task is deleted in the system.
***
title: task.deleted
description: This event is triggered when a task is deleted in the system.
full: true
icon: Trash
\_openapi:
toc: \[]
structuredData:
headings: \[]
contents: \[]
-------------
{/* This file was generated by Fumadocs. Do not edit this file directly. Any changes should be made by running the generation command again. */}
# task.failed
URL: /docs/tasks-events/task.failed
This event is triggered when a task is failed in the system.
***
title: task.failed
description: This event is triggered when a task is failed in the system.
full: true
icon: X
\_openapi:
toc: \[]
structuredData:
headings: \[]
contents: \[]
-------------
{/* This file was generated by Fumadocs. Do not edit this file directly. Any changes should be made by running the generation command again. */}
# List events
URL: /docs/v1/events
Retrieves a paginated list of events belonging to the authenticated user.
***
title: List events
description: Retrieves a paginated list of events belonging to the authenticated user.
full: true
\_openapi:
method: GET
route: /v1/events
toc: \[]
structuredData:
headings: \[]
contents:
* content: >-
Retrieves a paginated list of events belonging to the authenticated
user.
icon: GitGraph
***
{/* This file was generated by Fumadocs. Do not edit this file directly. Any changes should be made by running the generation command again. */}
# Get files paginated
URL: /docs/v1/files/get
Gets the files of the user paginated
***
title: Get files paginated
description: Gets the files of the user paginated
full: true
icon: FileStack
\_openapi:
method: GET
route: /v1/files
toc: \[]
structuredData:
headings: \[]
contents:
* content: Gets the files of the user paginated
***
{/* This file was generated by Fumadocs. Do not edit this file directly. Any changes should be made by running the generation command again. */}
# Upload a file
URL: /docs/v1/files/post
Creates a new file
***
title: Upload a file
description: Creates a new file
icon: Upload
full: true
\_openapi:
method: POST
route: /v1/files
toc: \[]
structuredData:
headings: \[]
contents:
* content: Creates a new file
***
{/* This file was generated by Fumadocs. Do not edit this file directly. Any changes should be made by running the generation command again. */}
# Apply an effect to an image
URL: /docs/v1/image-operations/apply-effect
Creates a task to apply a specified visual effect to an image.
***
title: Apply an effect to an image
description: Creates a task to apply a specified visual effect to an image.
full: true
icon: SwatchBook
\_openapi:
method: POST
route: /v1/image-operations/apply-effect
toc: \[]
structuredData:
headings: \[]
contents:
* content: Creates a task to apply a specified visual effect to an image.
***
{/* This file was generated by Fumadocs. Do not edit this file directly. Any changes should be made by running the generation command again. */}
# Convert image format
URL: /docs/v1/image-operations/convert
Creates a task to convert an image file to a different format.
***
title: Convert image format
description: Creates a task to convert an image file to a different format.
full: true
icon: RefreshCcw
\_openapi:
method: POST
route: /v1/image-operations/convert
toc: \[]
structuredData:
headings: \[]
contents:
* content: Creates a task to convert an image file to a different format.
***
{/* This file was generated by Fumadocs. Do not edit this file directly. Any changes should be made by running the generation command again. */}
# Detect documents in an image
URL: /docs/v1/image-operations/detect-documents
Creates a task to detect document boundaries within an image.
***
title: Detect documents in an image
description: Creates a task to detect document boundaries within an image.
full: true
icon: Scan
\_openapi:
method: POST
route: /v1/image-operations/detect-documents
toc: \[]
structuredData:
headings: \[]
contents:
* content: Creates a task to detect document boundaries within an image.
***
{/* This file was generated by Fumadocs. Do not edit this file directly. Any changes should be made by running the generation command again. */}
# Extract text from an image
URL: /docs/v1/image-operations/extract-text
Creates a task to extract text from a specified image file.
***
title: Extract text from an image
description: Creates a task to extract text from a specified image file.
full: true
icon: Eye
\_openapi:
method: POST
route: /v1/image-operations/extract-text
toc: \[]
structuredData:
headings: \[]
contents:
* content: Creates a task to extract text from a specified image file.
***
{/* This file was generated by Fumadocs. Do not edit this file directly. Any changes should be made by running the generation command again. */}
# Scan an image
URL: /docs/v1/image-operations/scan-image
Creates a task to scan an image file.
This is an equivalent operation for `detect-documents` and `warp` combined, additionally it can apply effects to the scanned image.
***
title: Scan an image
description: >-
Creates a task to scan an image file.
This is an equivalent operation for `detect-documents` and `warp` combined,
additionally it can apply effects to the scanned image.
full: true
icon: ScanLine
\_openapi:
method: POST
route: /v1/image-operations/scan
toc: \[]
structuredData:
headings: \[]
contents:
* content: >-
Creates a task to scan an image file.
This is an equivalent operation for `detect-documents` and `warp`
combined, additionally it can apply effects to the scanned image.
***
{/* This file was generated by Fumadocs. Do not edit this file directly. Any changes should be made by running the generation command again. */}
# Warp (perspective correct) an image
URL: /docs/v1/image-operations/warp
Creates a task to apply perspective correction (warp) to an image based on detected document boundaries.
***
title: Warp (perspective correct) an image
description: >-
Creates a task to apply perspective correction (warp) to an image based on
detected document boundaries.
full: true
icon: Proportions
\_openapi:
method: POST
route: /v1/image-operations/warp
toc: \[]
structuredData:
headings: \[]
contents:
* content: >-
Creates a task to apply perspective correction (warp) to an image
based on detected document boundaries.
***
{/* This file was generated by Fumadocs. Do not edit this file directly. Any changes should be made by running the generation command again. */}
# Extract pages from a PDF file
URL: /docs/v1/pdf-operations/extract-pages
Creates a task to extract specific pages from a PDF file into a new PDF file.
***
title: Extract pages from a PDF file
description: Creates a task to extract specific pages from a PDF file into a new PDF file.
full: true
icon: Upload
\_openapi:
method: POST
route: /v1/pdf-operations/extract-pages
toc: \[]
structuredData:
headings: \[]
contents:
* content: >-
Creates a task to extract specific pages from a PDF file into a new
PDF file.
***
{/* This file was generated by Fumadocs. Do not edit this file directly. Any changes should be made by running the generation command again. */}
# Merge files into PDF
URL: /docs/v1/pdf-operations/merge
Creates a task to merge multiple PDF and/or image files into a single PDF file.
***
title: Merge files into PDF
description: Creates a task to merge multiple PDF and/or image files into a single PDF file.
full: true
icon: Combine
\_openapi:
method: POST
route: /v1/pdf-operations/merge
toc: \[]
structuredData:
headings: \[]
contents:
* content: Creates a task to merge multiple PDF and/or image files into a single PDF file.
***
{/* This file was generated by Fumadocs. Do not edit this file directly. Any changes should be made by running the generation command again. */}
# Render PDF pages as images
URL: /docs/v1/pdf-operations/render
Creates a task to render specified pages of a PDF file as images.
***
title: Render PDF pages as images
description: Creates a task to render specified pages of a PDF file as images.
full: true
icon: FileImage
\_openapi:
method: POST
route: /v1/pdf-operations/render
toc: \[]
structuredData:
headings: \[]
contents:
* content: Creates a task to render specified pages of a PDF file as images.
***
{/* This file was generated by Fumadocs. Do not edit this file directly. Any changes should be made by running the generation command again. */}
# Split a PDF file
URL: /docs/v1/pdf-operations/split
Creates a task to split a PDF file into multiple single-page PDF files.
***
title: Split a PDF file
description: Creates a task to split a PDF file into multiple single-page PDF files.
full: true
icon: Split
\_openapi:
method: POST
route: /v1/pdf-operations/split
toc: \[]
structuredData:
headings: \[]
contents:
* content: >-
Creates a task to split a PDF file into multiple single-page PDF
files.
***
{/* This file was generated by Fumadocs. Do not edit this file directly. Any changes should be made by running the generation command again. */}
# List tasks
URL: /docs/v1/tasks/get
Retrieves a paginated list of tasks belonging to the authenticated user.
***
title: List tasks
description: Retrieves a paginated list of tasks belonging to the authenticated user.
full: true
icon: CheckCheck
\_openapi:
method: GET
route: /v1/tasks
toc: \[]
structuredData:
headings: \[]
contents:
* content: >-
Retrieves a paginated list of tasks belonging to the authenticated
user.
***
{/* This file was generated by Fumadocs. Do not edit this file directly. Any changes should be made by running the generation command again. */}
# Delete a file
URL: /docs/v1/files/id/delete
Delete a file by id
***
title: Delete a file
description: Delete a file by id
full: true
icon: Trash
\_openapi:
method: DELETE
route: /v1/files/{id}
toc: \[]
structuredData:
headings: \[]
contents:
* content: Delete a file by id
***
{/* This file was generated by Fumadocs. Do not edit this file directly. Any changes should be made by running the generation command again. */}
# Download a file
URL: /docs/v1/files/id/download
Download a file by id
***
title: Download a file
description: Download a file by id
full: true
icon: Download
\_openapi:
method: GET
route: /v1/files/{id}/download
toc: \[]
structuredData:
headings: \[]
contents:
* content: Download a file by id
***
{/* This file was generated by Fumadocs. Do not edit this file directly. Any changes should be made by running the generation command again. */}
# Get a single file by id
URL: /docs/v1/files/id/get
Get a single file by id
***
title: Get a single file by id
description: Get a single file by id
full: true
icon: FileText
\_openapi:
method: GET
route: /v1/files/{id}
toc: \[]
structuredData:
headings: \[]
contents:
* content: Get a single file by id
***
{/* This file was generated by Fumadocs. Do not edit this file directly. Any changes should be made by running the generation command again. */}
# Get Task
URL: /docs/v1/tasks/id/get
Retrieves the data for a specific task by its ID.
***
title: Get Task
description: Retrieves the data for a specific task by its ID.
full: true
icon: Check
\_openapi:
method: GET
route: /v1/tasks/{id}
toc: \[]
structuredData:
headings: \[]
contents:
* content: Retrieves the data for a specific task by its ID.
***
{/* This file was generated by Fumadocs. Do not edit this file directly. Any changes should be made by running the generation command again. */}