API Integration Tutorial
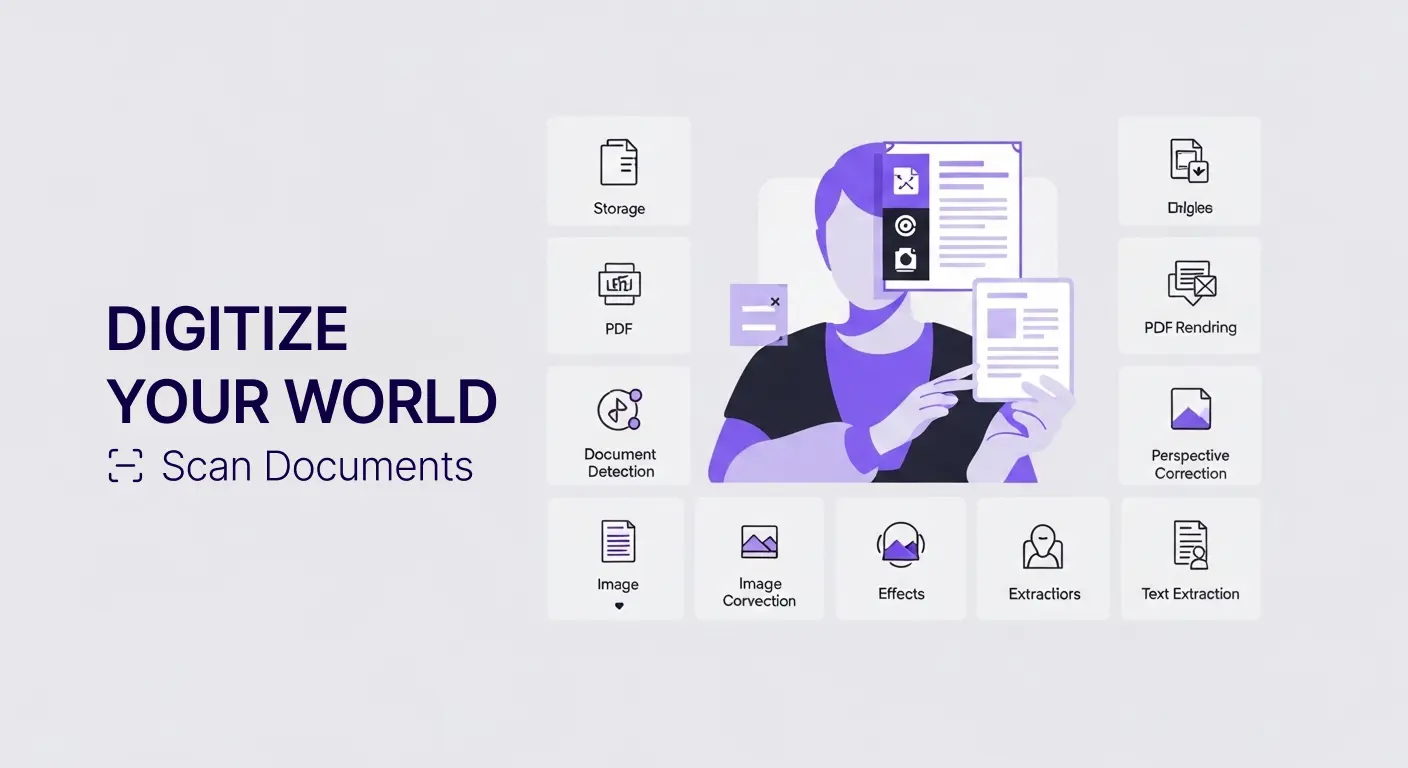
Building applications that process documents requires capabilities most developers do not want to build from scratch. Document detection, perspective correction, OCR, and PDF manipulation involve complex computer vision and image processing that takes months to develop and perfect.
The Scan Documents API provides these capabilities as ready-to-use services. Instead of building document processing infrastructure, developers can integrate proven functionality through simple API calls. This accelerates development and lets teams focus on their unique application features.
This tutorial guides developers through integrating the Scan Documents API into applications. Whether you are building mobile apps, web platforms, or backend automation, you will learn how to add powerful document processing with minimal effort.
Getting Started
Create an account at scan-documents.com to obtain your API key. This key authenticates your requests and tracks usage.
The API base URL is https://api.scan-documents.com/v1/. All endpoints are accessed via this base address.
Authentication uses the x-api-key header. Include your API key in this header with every request.
API responses return JSON formatted data. Parse JSON responses to access results from your calls.
Rate limits depend on your subscription plan. The free tier provides 25 operations monthly, suitable for development and testing. Paid plans offer higher limits for production use.
First API Call
Start with a simple file upload to verify your integration works. This uploads an image or PDF to the API for storage and subsequent processing.
Use POST request to /files endpoint. Include your image or PDF as multipart form data in the file parameter.
Set the x-api-key header to your API key. Without this authentication, requests will fail.
The response includes a file object with a unique ID. Save this ID for referencing the file in subsequent operations.
Example using curl:
curl -X POST https://api.scan-documents.com/v1/files \
  -H "x-api-key: YOUR_API_KEY" \
  -F "file=@document.jpg"
The response looks like:
{
  "id": "file_abc123",
  "created": 1234567890,
  "filename": "document.jpg",
  "size": 524288,
  "type": "image/jpeg"
}
JavaScript SDK
Install the JavaScript SDK for easier integration if using Node.js or browser JavaScript. The SDK handles authentication, request formatting, and error handling.
Install via npm:
npm install scan-documentsImport and initialize with your API key:
import ScanDocuments from 'scan-documents';

const client = new ScanDocuments('YOUR_API_KEY');
Upload a file using the SDK:
const file = await client.files.upload('./document.jpg');
console.log('File ID:', file.id);
The SDK simplifies common operations providing clean JavaScript interfaces instead of raw HTTP requests.
Document Detection
Document detection identifies document boundaries within images. This is essential when photos contain documents but also capture surrounding areas.
After uploading a file, call the detect operation specifying the file ID. The API analyzes the image and returns corner coordinates of detected documents.
POST to /image-operations endpoint with operation set to "detect" and fileId specifying which file to process:
const detection = await client.imageOperations.detect({
  fileId: file.id
});

console.log('Document corners:', detection.corners);
The response includes corner coordinates defining the document boundaries. Use these coordinates for subsequent operations like warping or cropping.
Perspective Correction
Photographs of documents often have perspective distortion when taken at angles. Perspective correction (warping) transforms distorted images into straight, rectangular documents.
Use the warp operation providing the file ID and corner coordinates from detection. The API corrects perspective and returns a new file ID for the corrected image.
const warped = await client.imageOperations.warp({
  fileId: file.id,
  corners: detection.corners
});

console.log('Warped file ID:', warped.fileId);
The resulting image appears as if photographed directly from above, ideal for OCR or presentation.
Text Extraction with OCR
Extract text from documents using OCR. Specify the file ID and desired output format. The API supports plain text, markdown, HTML, and JSON formats.
const text = await client.imageOperations.extractText({
  fileId: warped.fileId,
  format: 'text'
});

console.log('Extracted text:', text.content);
For structured data extraction, use JSON format with a schema defining expected fields:
const data = await client.imageOperations.extractText({
  fileId: warped.fileId,
  format: 'json',
  schema: {
    type: 'object',
    properties: {
      name: { type: 'string' },
      date: { type: 'string' },
      amount: { type: 'number' }
    }
  }
});

console.log('Extracted data:', data.content);
The schema-based extraction returns structured data matching your defined format, ready for database insertion.
Converting Images
Convert images between formats using the convert operation. Transform PNG to JPEG, resize images, or create thumbnails.
const converted = await client.imageOperations.convert({
  fileId: file.id,
  format: 'jpeg',
  quality: 85
});

console.log('Converted file ID:', converted.fileId);
This is useful for normalizing images from various sources into consistent formats for your application.
PDF Operations
Create PDFs from images using the merge operation. Combine multiple images into a single multi-page PDF.
const pdf = await client.pdfOperations.merge({
  fileIds: [image1.id, image2.id, image3.id]
});

console.log('PDF file ID:', pdf.fileId);
Split PDFs into individual pages using the split operation:
const pages = await client.pdfOperations.split({
  fileId: pdf.id
});

console.log('Page file IDs:', pages.map(p => p.fileId));
Extract specific page ranges from PDFs:
const excerpt = await client.pdfOperations.extractPages({
  fileId: pdf.id,
  pages: [1, 2, 3]
});

console.log('Excerpt file ID:', excerpt.fileId);
Render PDF pages as images for display or processing:
const images = await client.pdfOperations.render({
  fileId: pdf.id,
  format: 'png',
  dpi: 150
});

console.log('Rendered image IDs:', images.map(i => i.fileId));
Asynchronous Processing
Some operations may take time for large files or complex processing. These use asynchronous task-based workflows.
Create tasks for long-running operations. The API immediately returns a task ID. Poll the task status or use webhooks for completion notifications.
const task = await client.tasks.create({
  operation: 'extractText',
  fileId: largeFile.id,
  parameters: { format: 'text' }
});

console.log('Task ID:', task.id);
Poll task status:
const status = await client.tasks.get(task.id);

if (status.status === 'completed') {
  console.log('Result:', status.result);
} else if (status.status === 'failed') {
  console.error('Error:', status.error);
}
Webhook Integration
Webhooks provide event-driven notification when operations complete. Instead of polling, your application receives HTTP POST requests when events occur.
Configure webhook endpoints in your account settings. Specify a URL where the API will send event notifications.
The API sends POST requests to your webhook URL when events like file uploads, task completions, or task failures occur.
Your endpoint receives JSON payloads describing events:
{
  "id": "event_xyz789",
  "type": "task.completed",
  "data": {
    "task": {
      "id": "task_abc123",
      "status": "completed",
      "result": {
        "fileId": "file_result123"
      }
    }
  }
}
Process events in your application:
app.post('/webhooks/scan-documents', (req, res) => {
  const event = req.body;

  if (event.type === 'task.completed') {
    const taskId = event.data.task.id;
    const resultFileId = event.data.task.result.fileId;

    // Handle completed task
    processResult(resultFileId);
  }

  res.sendStatus(200);
});
Webhooks enable real-time processing workflows that respond immediately when operations finish.
Error Handling
API errors return HTTP status codes indicating problem types. 4xx codes indicate client errors like invalid parameters. 5xx codes indicate server errors.
Response bodies include error details:
{
  "error": {
    "type": "invalid_request",
    "message": "File ID is required"
  }
}
Implement error handling in your application:
try {
  const result = await client.imageOperations.detect({
    fileId: 'invalid_id'
  });
} catch (error) {
  if (error.type === 'invalid_request') {
    console.error('Invalid request:', error.message);
  } else if (error.type === 'not_found') {
    console.error('File not found:', error.message);
  } else {
    console.error('Unexpected error:', error);
  }
}
Proper error handling ensures your application responds gracefully to problems.
File Management
List uploaded files to see what is stored in your account:
const files = await client.files.list({
  limit: 100
});

console.log('Files:', files.data);
Retrieve specific files by ID:
const file = await client.files.get('file_abc123');
console.log('File details:', file);
Download file contents:
const content = await client.files.download('file_abc123');
// content is a buffer or stream depending on environment
Delete files when no longer needed:
await client.files.delete('file_abc123');
console.log('File deleted');
Proper file management prevents unnecessary storage costs and keeps your account organized.
Building Complete Workflows
Combine operations into complete document processing workflows. For example, a receipt processing workflow might:
- Upload receipt photo
- Detect document boundaries
- Warp to correct perspective
- Extract text with receipt schema
- Store extracted data in database
- Delete intermediate files
async function processReceipt(imagePath) {
  // Upload
  const file = await client.files.upload(imagePath);

  // Detect and warp
  const detection = await client.imageOperations.detect({
    fileId: file.id
  });

  const warped = await client.imageOperations.warp({
    fileId: file.id,
    corners: detection.corners
  });

  // Extract data
  const data = await client.imageOperations.extractText({
    fileId: warped.fileId,
    format: 'json',
    schema: {
      type: 'object',
      properties: {
        merchant: { type: 'string' },
        date: { type: 'string' },
        total: { type: 'number' },
        items: {
          type: 'array',
          items: {
            type: 'object',
            properties: {
              description: { type: 'string' },
              amount: { type: 'number' }
            }
          }
        }
      }
    }
  });

  // Store in database
  await database.receipts.insert(data.content);

  // Cleanup
  await client.files.delete(file.id);
  await client.files.delete(warped.fileId);

  return data.content;
}
This workflow automates receipt processing from photo to database in a few API calls.
Mobile Integration
Mobile apps benefit greatly from document processing capabilities. Users photograph documents with phone cameras, and your app processes them automatically.
In React Native, capture images using camera libraries then upload to the API:
import { launchCamera } from 'react-native-image-picker';
import ScanDocuments from 'scan-documents';

const client = new ScanDocuments('YOUR_API_KEY');

async function scanDocument() {
  const result = await launchCamera({ mediaType: 'photo' });

  if (result.assets && result.assets[0]) {
    const photo = result.assets[0];

    const file = await client.files.upload(photo.uri);
    const detection = await client.imageOperations.detect({
      fileId: file.id
    });
    const warped = await client.imageOperations.warp({
      fileId: file.id,
      corners: detection.corners
    });

    return warped.fileId;
  }
}
Similar patterns work in Flutter, Swift, and Kotlin for native mobile development.
Web Application Integration
Web applications can upload files from form inputs or drag-and-drop interfaces:
document.getElementById('fileInput').addEventListener('change', async (e) => {
  const file = e.target.files[0];

  const uploaded = await client.files.upload(file);
  const result = await client.imageOperations.extractText({
    fileId: uploaded.id,
    format: 'text'
  });

  document.getElementById('output').textContent = result.content;
});
Progressive enhancement allows showing processing progress:
const fileInput = document.getElementById('fileInput');
const progress = document.getElementById('progress');

fileInput.addEventListener('change', async (e) => {
  const file = e.target.files[0];

  progress.textContent = 'Uploading...';
  const uploaded = await client.files.upload(file);

  progress.textContent = 'Processing...';
  const result = await client.imageOperations.extractText({
    fileId: uploaded.id
  });

  progress.textContent = 'Complete!';
  displayResult(result);
});
Backend Automation
Server-side applications automate document processing without user interaction. Process documents from email attachments, web form submissions, or scheduled jobs.
Example using Node.js to process emailed documents:
import { ImapFlow } from 'imapflow';
import ScanDocuments from 'scan-documents';

const client = new ScanDocuments('YOUR_API_KEY');

async function processEmailAttachments() {
  const imap = new ImapFlow({ /* config */ });
  await imap.connect();

  const messages = await imap.fetch('UNSEEN', {
    source: true
  });

  for await (const msg of messages) {
    const attachments = extractAttachments(msg.source);

    for (const attachment of attachments) {
      const file = await client.files.upload(attachment.content);
      const text = await client.imageOperations.extractText({
        fileId: file.id
      });

      await processExtractedText(text.content);
    }
  }
}
This automation processes documents as they arrive without manual intervention.
Zapier Integration
Non-developers can integrate using Zapier. The Scan Documents Zapier integration provides no-code automation.
Create Zaps that trigger when files are uploaded to cloud storage, then process them with Scan Documents, and finally save results to spreadsheets or databases.
This enables business users to build document processing workflows without programming.
Testing and Development
Use the free tier for development and testing. The 25 monthly operations allow experimenting and building applications before committing to paid plans.
Test with representative documents matching your production use cases. Recognition accuracy varies by document type and quality.
Implement logging to track API usage and identify issues. Log file IDs, operation types, and results for troubleshooting.
Monitoring and Optimization
Track API usage through your account dashboard. Monitor operation counts to ensure you stay within plan limits.
Optimize by deleting temporary files after processing. Keeping unnecessary files consumes storage quota.
Cache results when appropriate. If the same document is processed multiple times, cache extracted text instead of repeating API calls.
Batch operations when possible. Process multiple similar documents together to optimize performance.
Security Considerations
Protect your API key. Never expose keys in client-side code or public repositories. Use environment variables or secure configuration management.
Validate file uploads before sending to the API. Check file types and sizes to prevent malicious uploads.
Handle extracted data securely. Text extracted from documents may contain sensitive information requiring proper protection.
Use HTTPS for all API communication. The API enforces HTTPS, but ensure your application does not downgrade to HTTP.
Scaling Production Usage
As usage grows, upgrade to appropriate paid plans with higher operation limits. Monitor usage trends to anticipate when upgrades are needed.
Implement queuing for high-volume processing. Use message queues to manage processing jobs preventing overwhelming the API with concurrent requests.
Distribute processing across time if possible. Spread batch jobs throughout the day rather than processing everything at once.
Consider geographical distribution. If serving global users, minimize latency by routing requests efficiently.
Support and Resources
API documentation at docs.scan-documents.com provides comprehensive reference for all endpoints and parameters.
Code examples in multiple languages help with integration. Find samples for JavaScript, Python, Ruby, PHP, and other popular languages.
Community forums connect developers building with the API. Share solutions and learn from others' experiences.
Support tickets provide direct assistance for technical issues. Contact support when encountering problems or having questions.
Conclusion
The Scan Documents API provides powerful document processing capabilities through simple HTTP interfaces. Whether building mobile apps, web platforms, or backend automation, adding document detection, OCR, and PDF processing takes hours instead of months.
Start with the free tier to experiment and prove value. The JavaScript SDK simplifies integration for web and Node.js developers. Webhooks enable event-driven architectures that scale efficiently.
From simple text extraction to complex multi-stage workflows, the API handles document processing so you can focus on building unique application features. Begin integrating today and experience how easy adding professional document processing to your application can be.